What's in this post...
![]()
Last Updated on October 20, 2021 by Graham Walsh
Many organisations I meet are trying to get to a clear table environment and have some sort of Wireless Content Sharing in the room. There are many vendors out there such as the Crestron AirMed, Barco Clickshare, Mersive Solstice, AirTame, and others. This means users are able to use wireless technology built into laptops and mobile devices such as Miracast and AirPlay to stream to these devices. First off, let look at how we do this natively with Microsoft Teams.
Native Microsoft Teams Sharing
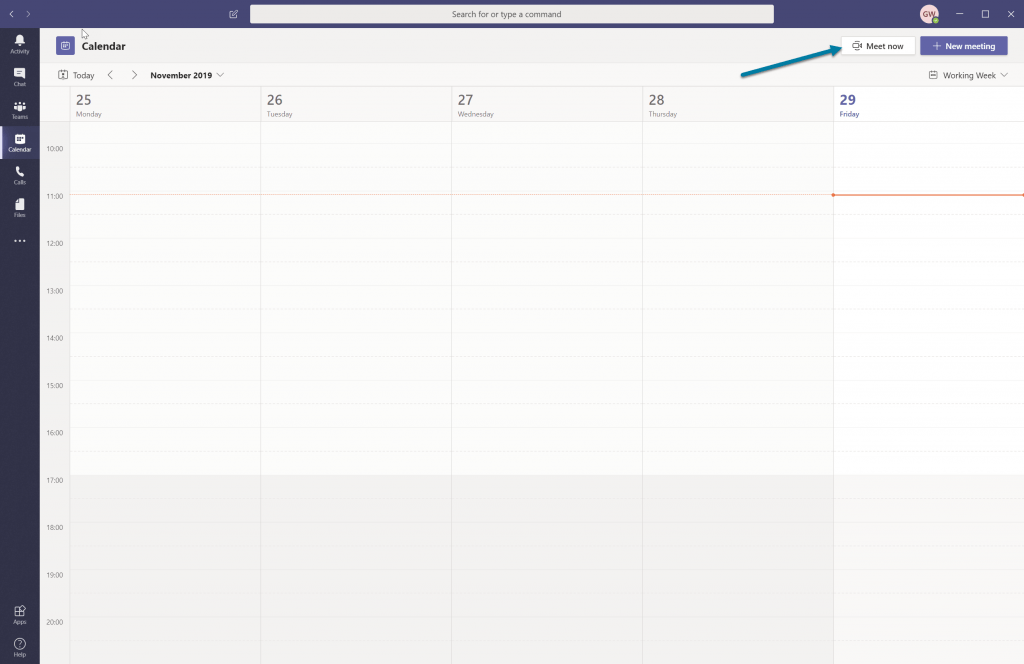
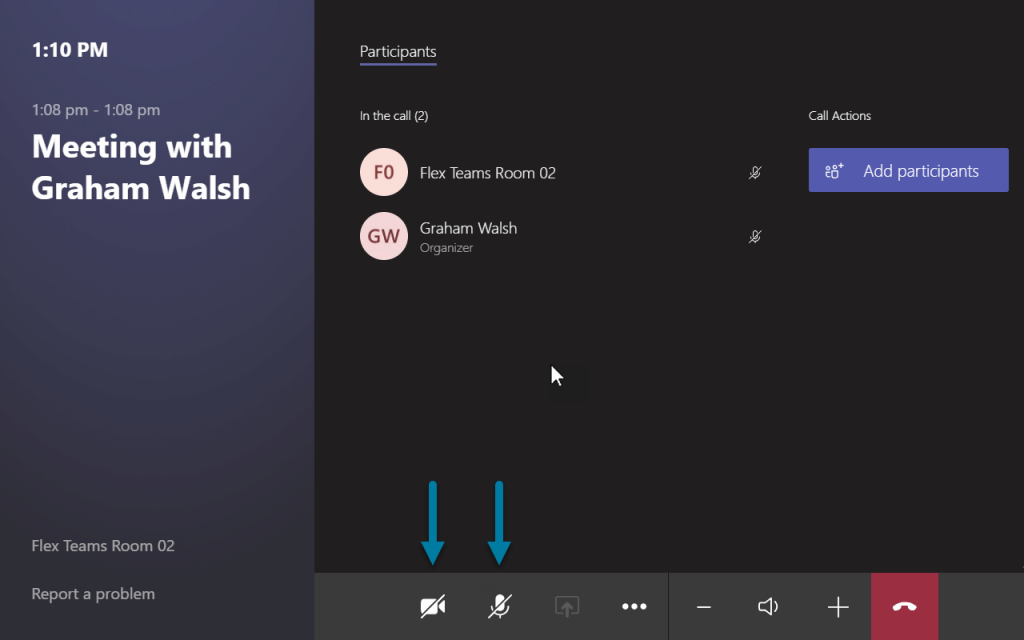
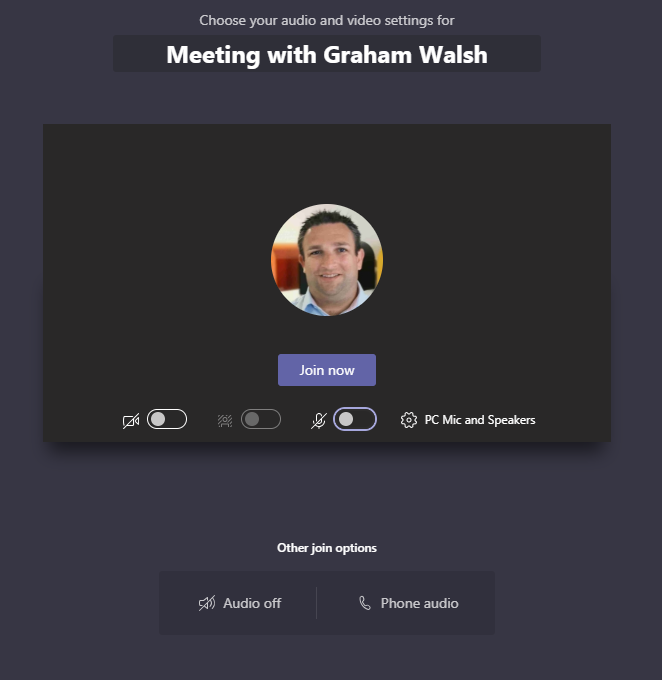
With just the Microsoft Teams Room system, you can use either the HDMI cable to present to the room and then this will also share audio content, or when in a meeting, it will share just content, not audio. See my blog here on more details. The other way to share content into the room wirelessly, you can do a Meet Now in your Teams Client and when you are in the room, your client will recognise this and ask if you want to bring the system into the call. See below on how to do this. You can then wireless share your screen or app into the room. Just make sure your camera and mic are off!!
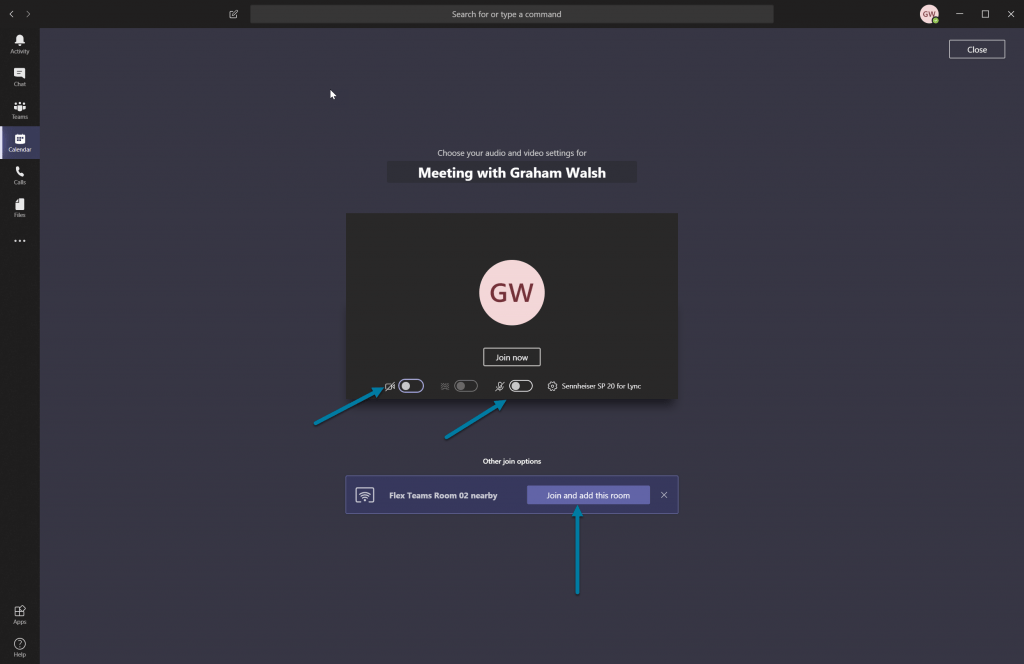
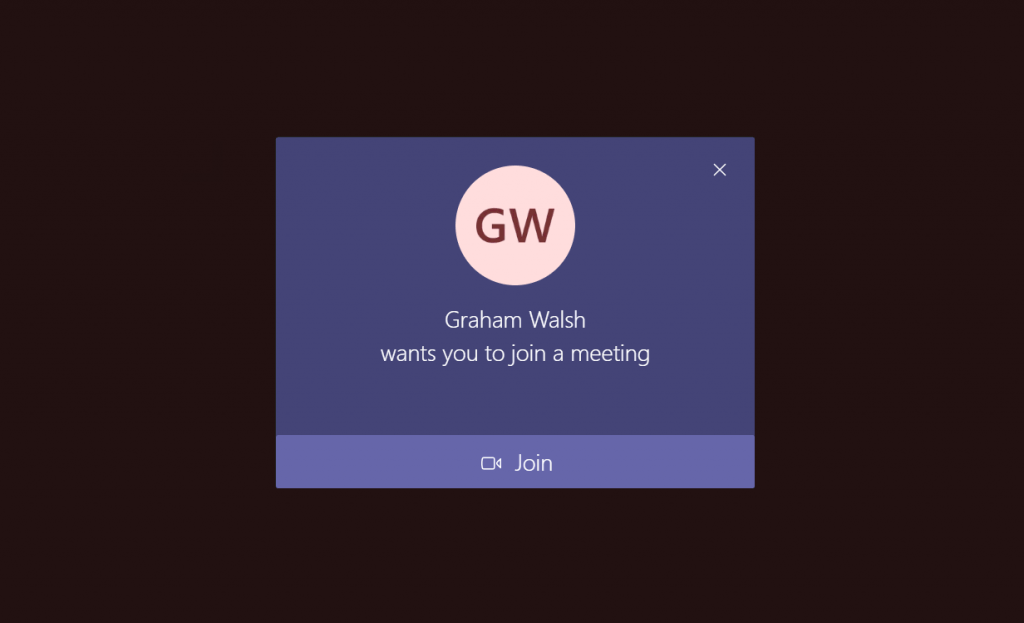
This is using the Bluetooth Beaconing feature of the MTR between the client and MTR system. Obviously you need Bluetooth switched on within your device settings. This will then place a call to the MTR system, so when the incoming call rings, just click on the Join button. You will need to mute the room camera and mic, so it’s content sharing only.

Sharing Content from the Teams Client
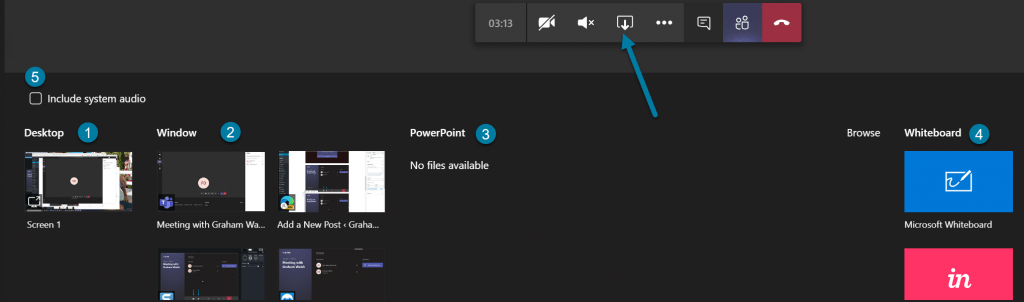
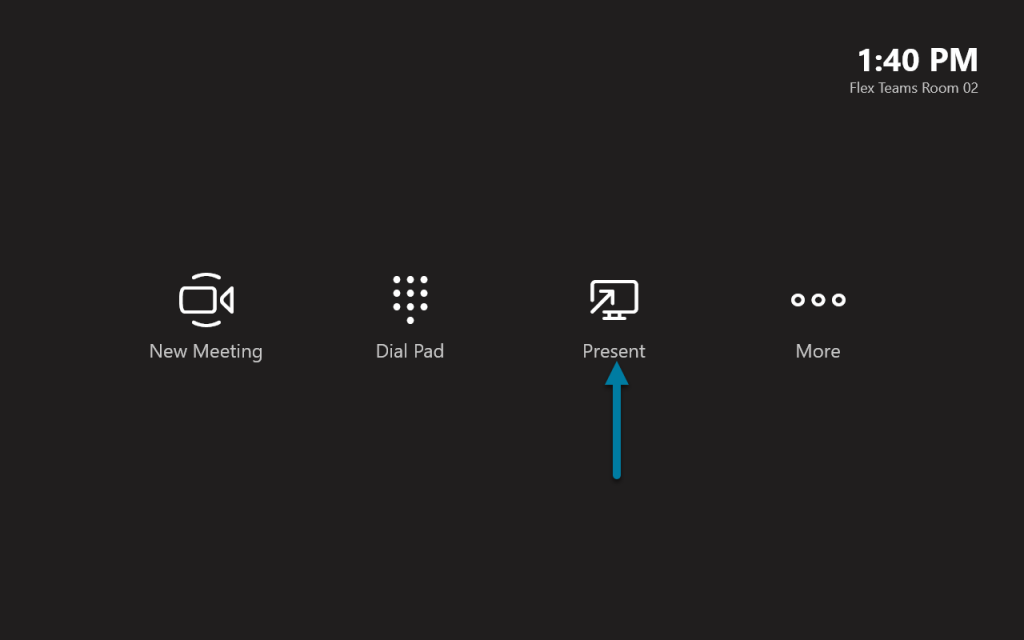
Now that the camera and mics are muted, you can head back to your desktop client and click on the Present icon. You can select your whole desktop, a window/app, uploaded PowerPoint or Microsoft White. You then have the option of sending in your system audio. Just remember to mute your local speakers as it will come through the MTR room speakers. You will then see the content on the Front of Room screens.
So this method of sharing is all good if you are on the network and able to access the Teams meeting server. This also works when you are using the Teams in a browser. However, you just get to share desktop and no system audio.
What happens when I’m a guest in the meeting room and I have a different Microsoft Teams tenant? Well, you don’t see that the meeting room is available. Just not there, so your only option is HDMI.
Introducing Crestron AirMedia 2.0
So Crestron has had wireless content sharing for a while and with the latest release, there is a Flex mode. What’s this you ask? When you connect an input to the MTR, it wants to send that content source all the time. You can enable/disable auto sending when in an online meeting via the settings, but when in the room locally, it’s happening whenever the content is seen on that input. What does this mean in real life? Well you lose the MTR branding wallpaper and you see the native wireless sharing screen whether it’s from Crestron, Mersive, Barco etc. See below for an example.
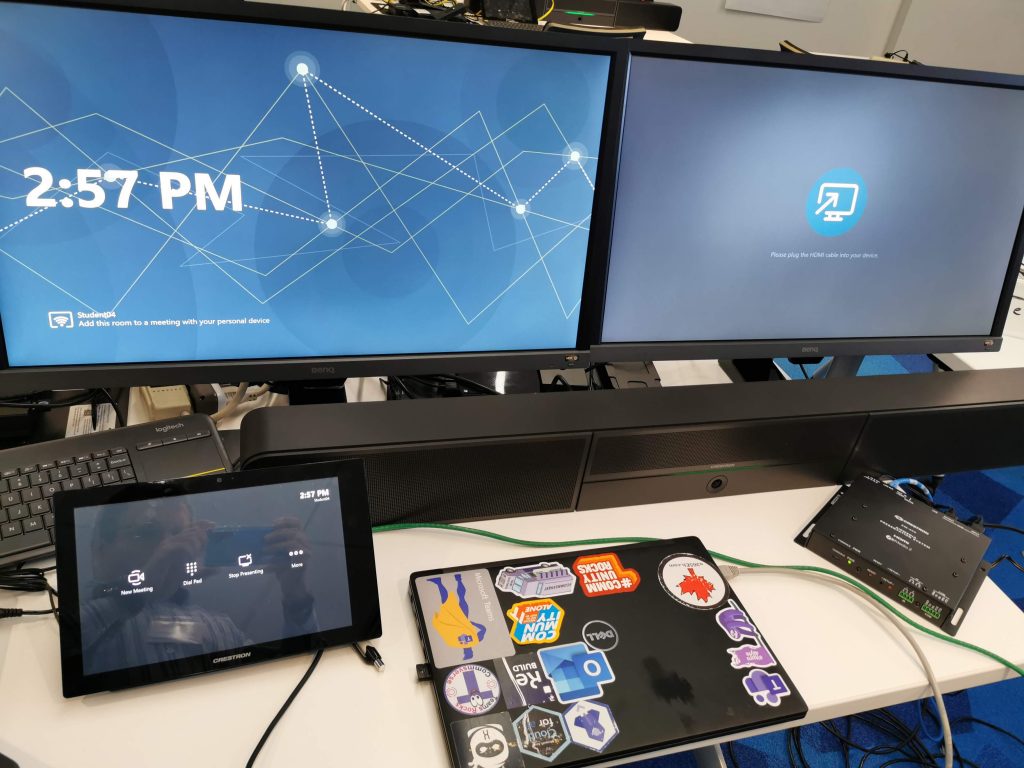
You could customise the wallpaper to make it look like an MTR, so your company wallpaper and logo on that splash screen. It would also still have the directions on how to connect via Wireless. So Crestron came up with a Flex mode for the AirMedia. This means the content is not shared until someone presses the Present button on the Centre of Room console.
AirMedia Overview
But wait, there is more. Crestron AirMedia is not just a one-trick pony. It can do HDMI and Wireless with the AM-200 and with the AM-300, it adds on the capability for Digital Media (DM). From the product guide.
The DM input may also be used to connect to a DM switcher, which may be located up to 330 ft (100 m) away, to support the display of content from another room or other remote location. The HDMI input supports HD 1080p signals while the DM input supports 4K signals.
https://www.crestron.com/Products/Workspace-Solutions/Wireless-Presentation-Solutions/Crestron-AirMedia-Presentation-Systems/AM-300
Here is a video overview of the AirMedia capabilities.
AirMedia® 2.0: Enterprise-Grade Wireless Presentation Solution from Crestron Electronics, Inc. on Vimeo.
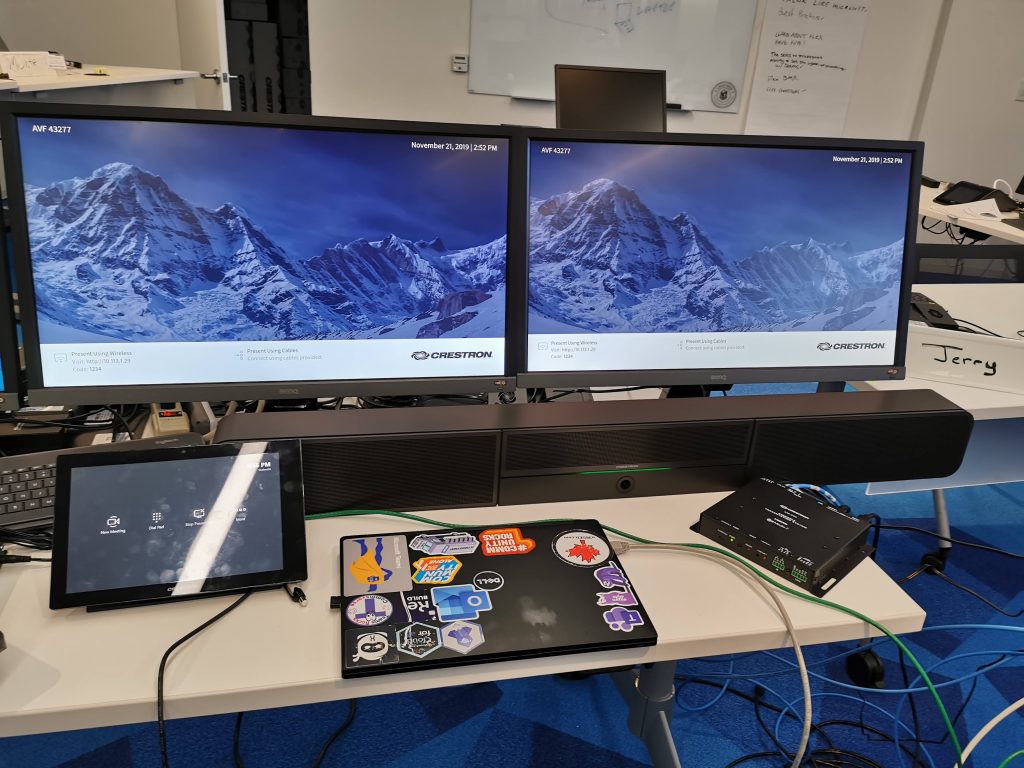
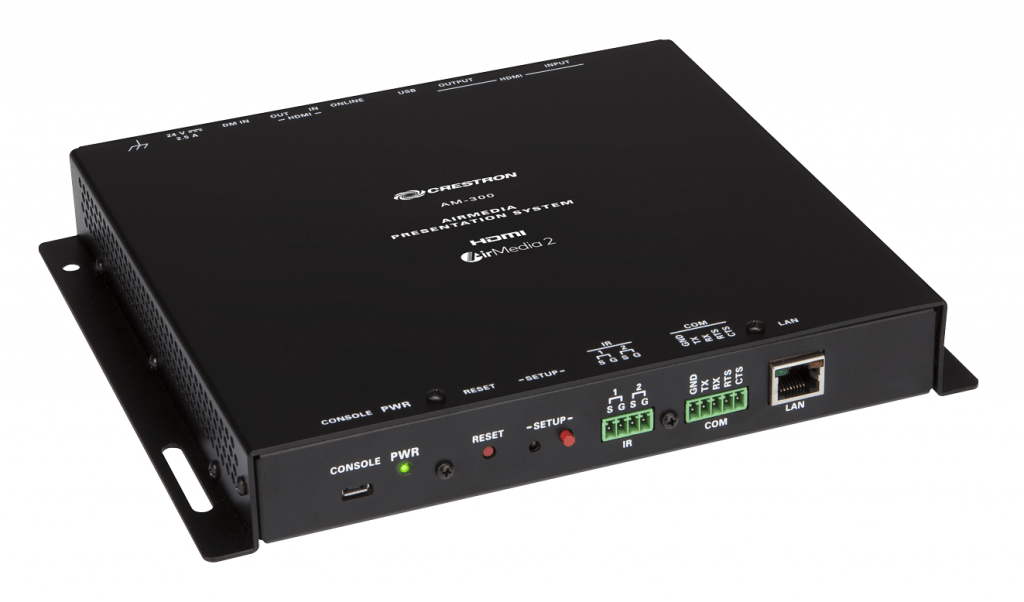
And this is what it looks like. A small device that is usually mounted to the wall near the Crestron Flex UC Engine plate. It is powered using standard POE and configuration is done via a web interface or it can also be added to Crestron XIO Cloud that’s hosted in the Microsoft Azure IoT Hub, so you can control them centrally.
AirMedia with Flex Mode
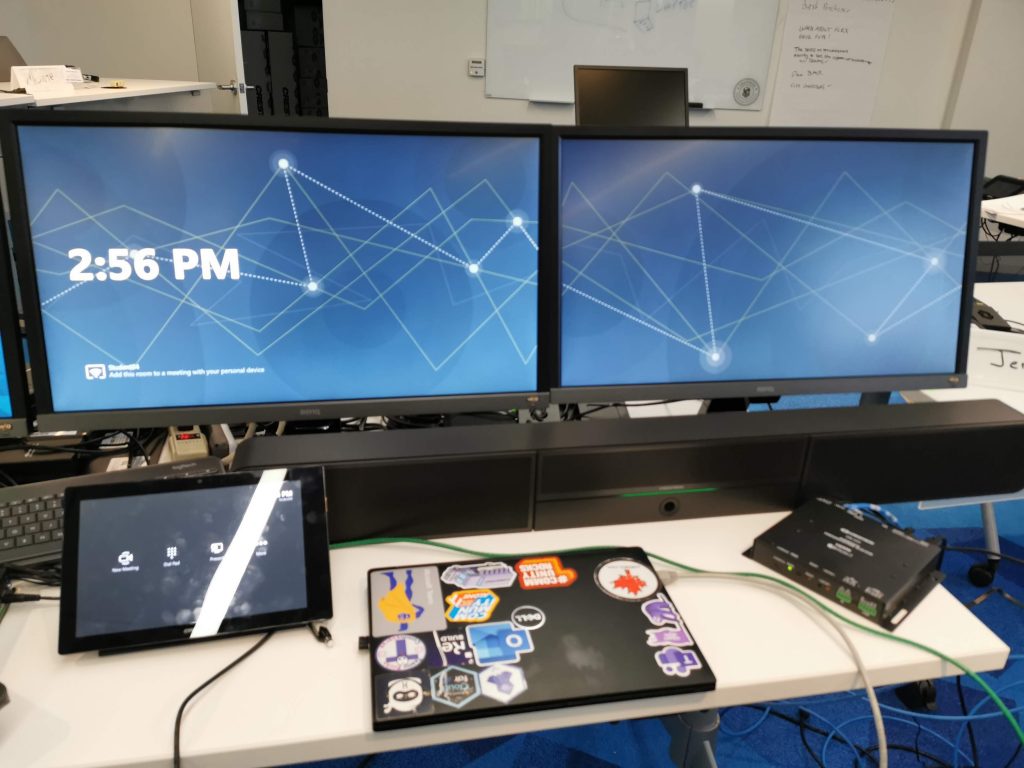
Take one Crestron Flex and one Crestron AirMedia and we have a normal setup like the screen below. You could, of course, customise the wallpaper with your own one.
When you do press the Present button, it acts as normal. But here’s the neat bit. Remember I said AirMedia was HDMI and Wireless content sharing? How do you get to that? Well, we can upload a project to the Crestron Flex UC Engine. We can do it via the Windows Desktop on the Flex systems or via XiO Cloud.
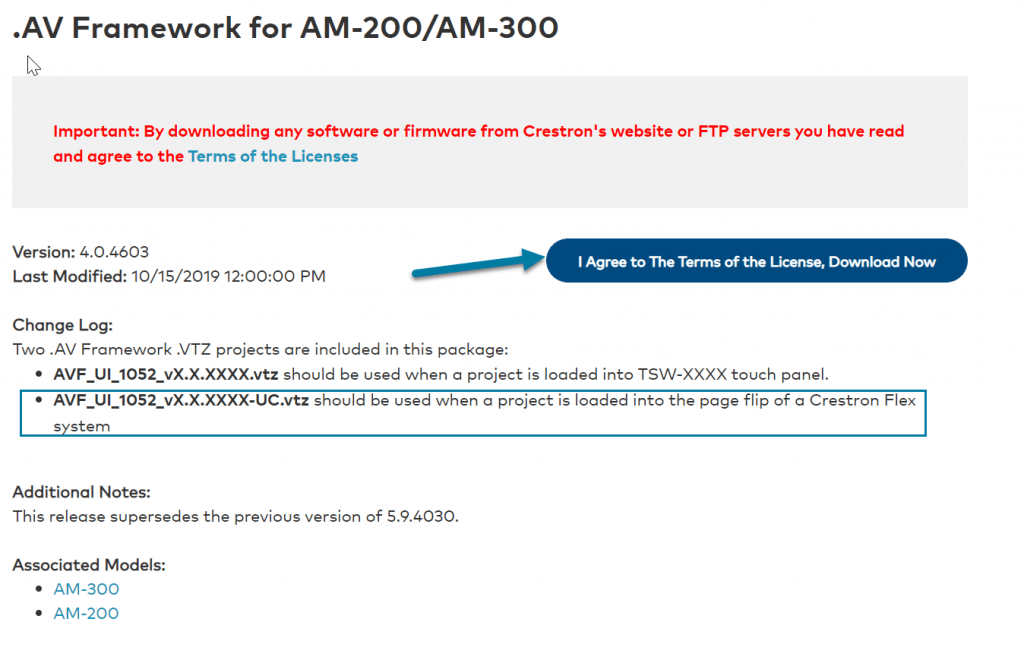
The project file is hosted on the Crestron site here but you’ll need a login to access it. Download the ZIP file and we need the -UC file.
Uploading via XiO Cloud
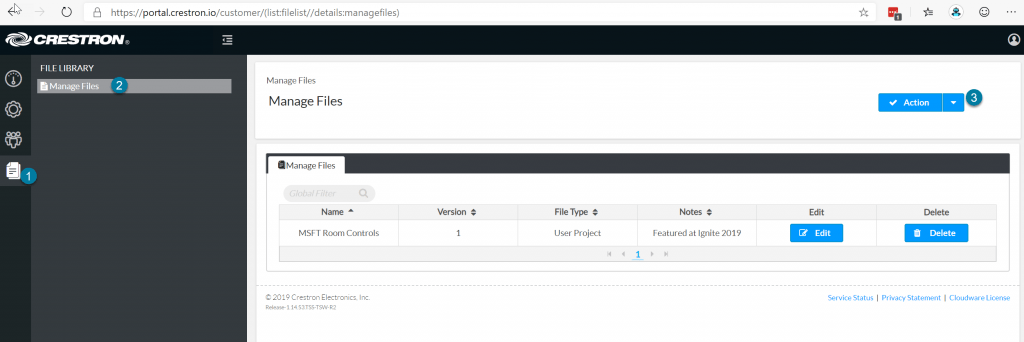
Log into your XiO account and head to the Files section in the left rail (1) and then click on Manage Files (2). Next, drop down by Actions and select Upload file (3).
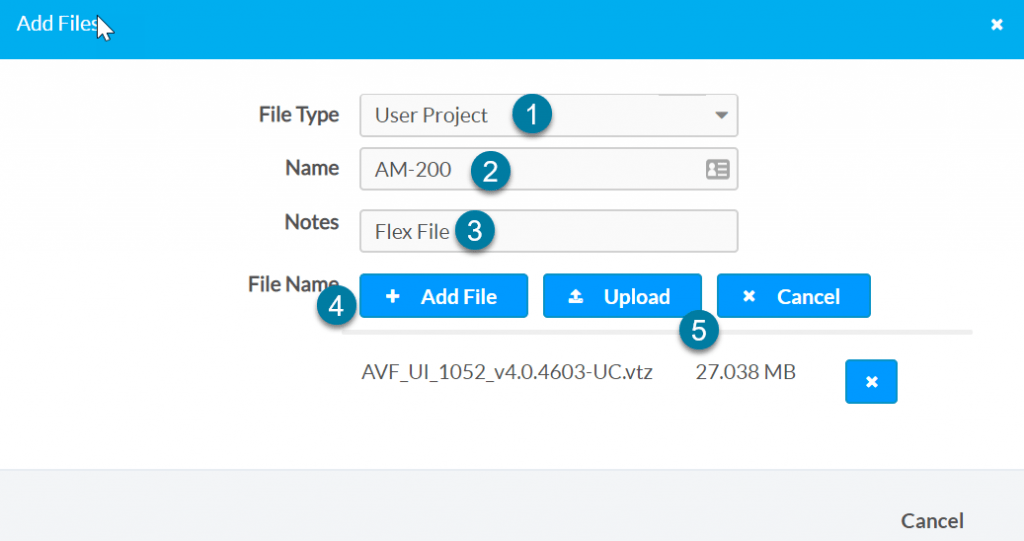
Now we need to select User Project, give it a name and a description. Then click on Add file and find the -UC file that you’ve extracted from the zip file. Then click on Upload. The file will then upload to the XiO Cloud. Now we can navigate to our UC Engine that we want to upload the file to.
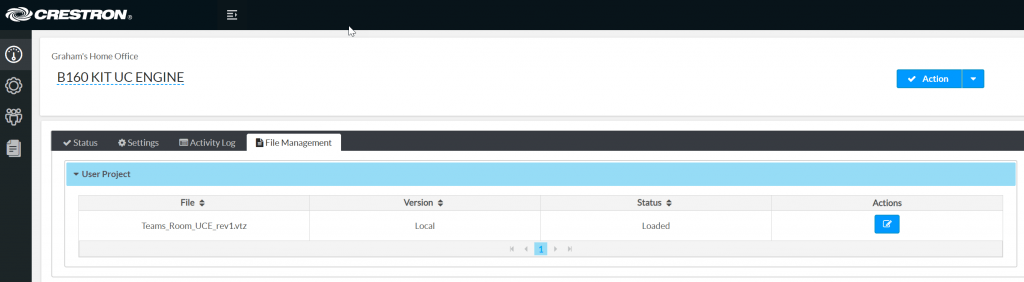
As you can see below, I already have a user project set on my device. I simply click the Actions icon and then select which project file I want to use on the Flex system and select Update. This will then put this on the remote system.

Uploading via UC Engine
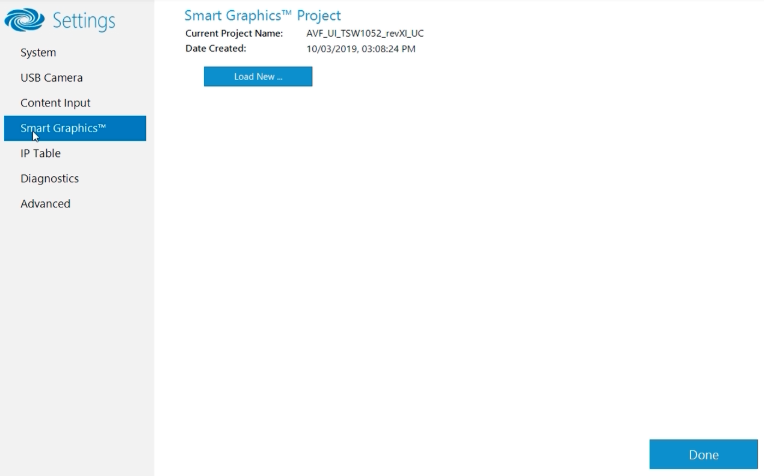
If you log out of the Skype kiosk mode and then into the Admin side of the UC Engine and head to Crestron App. Then click on Smart Graphics and load in the correct file -UC as mentioned above.
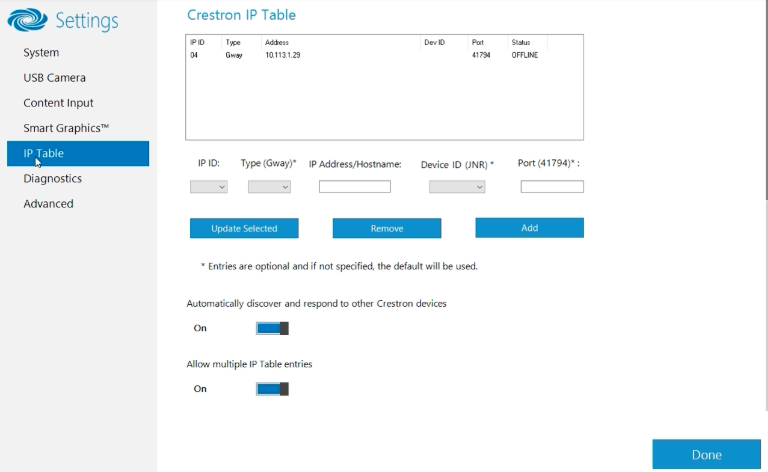
Now we need to click on IP Table to tell the UC Engine and Project File, the IP address of the AirMedia. So here we enter the IP ID (the lowest possible) and then IP Address. Then click Add. We don’t need to worry about anything else unless you’ve changed the defaults.
Enabling Flex mode on the AirMedia
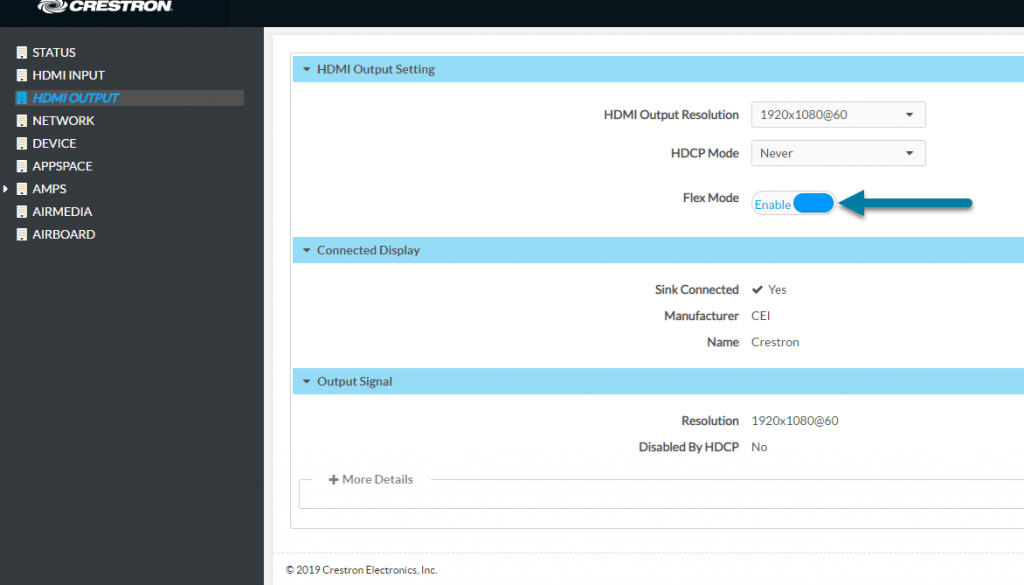
Now we need to enable Flex mode on the AirMedia unit. Open a browser and browse to the IP Address of the AirMedia (which you’ll see on your MTR Flex Screen) and click on the Cogs icon in the top right. Now navigate to HDMI Output in the left-hand menu and change Flex Mode to Enabled. Then click on Save Changes in the top right.
Selecting the AirMedia Source
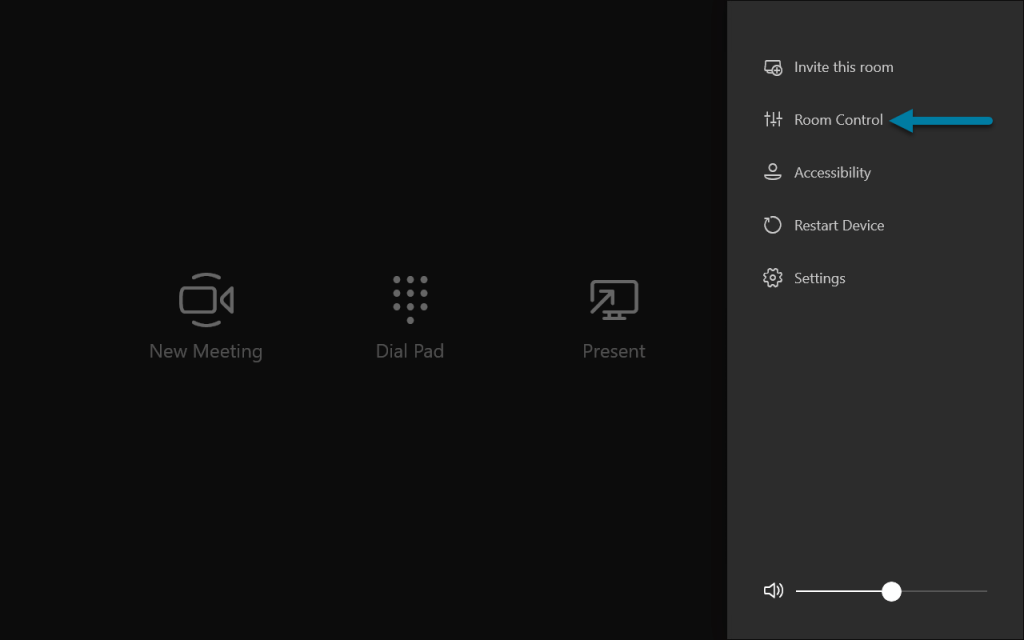
As the AM-200 has multiple sources, how do we change it on the Microsoft Teams Room system. That custom project we uploaded has a use. On the MTR console, we simply select More and then Room Control. We will then be presented with the AirMedia options.
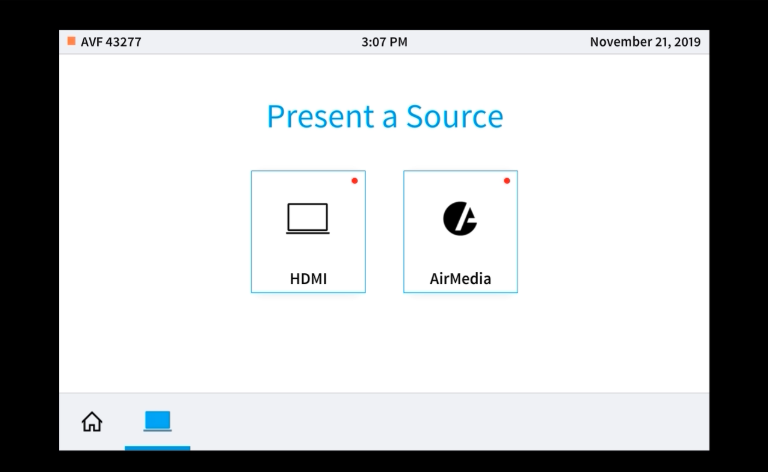
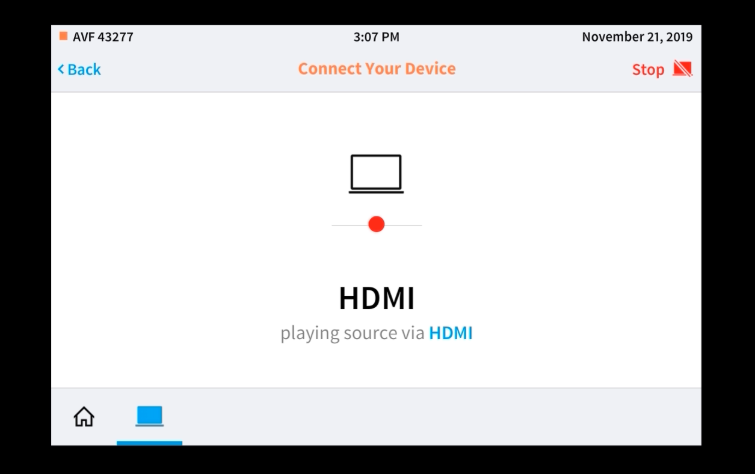
We can now select either the HDMI cable or the wireless AirMedia. HDMI does exactly what it says, presents the HDMI content.
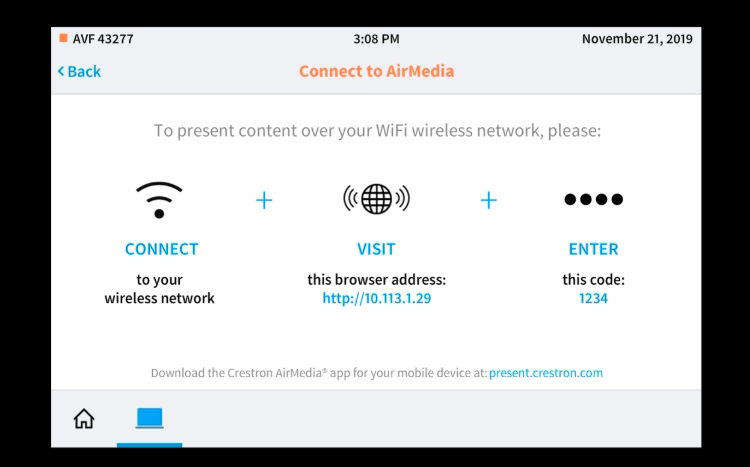
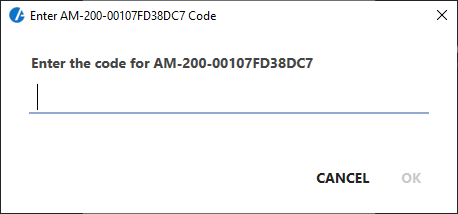
When you select the AirMedia option, you then get to see the IP Address you need to connect to and it’s PIN code to present (if enabled). To connect over Wireless there are a few options. You may need to have different VLANs between your corporate and wireless network which I’ll discuss later below. I have the option of using Miracast, AirPlay, AirMedia app (Windows/Mac/Android/iOS) or even a Chrome extension via Microsoft Edge Chromium or Google Chrome browser.
Connecting with AirMedia App
When using the AirMedia app, you can discover in one of two ways. Either by entering the IP address as seen in the centre of the room panel or via a discovery list. Below it has discovered my system. I’ve not given it a friendly name, but the systems listed in a roomlist.xml all have friendly names.
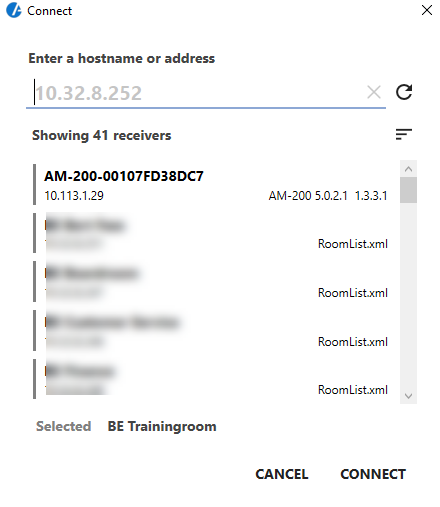
When using the app with wireless connectivity, audio is transmitted too.

Connecting via Chrome Extension
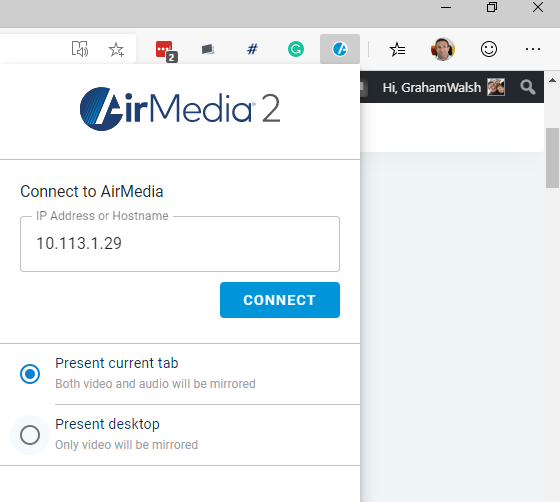
Simple search the App Store for AirMedia and install the extension. You will then see it in your available extensions. You can then click on it and type the name or IP of the AirMedia server and select whether you want your desktop or just a tab shared.

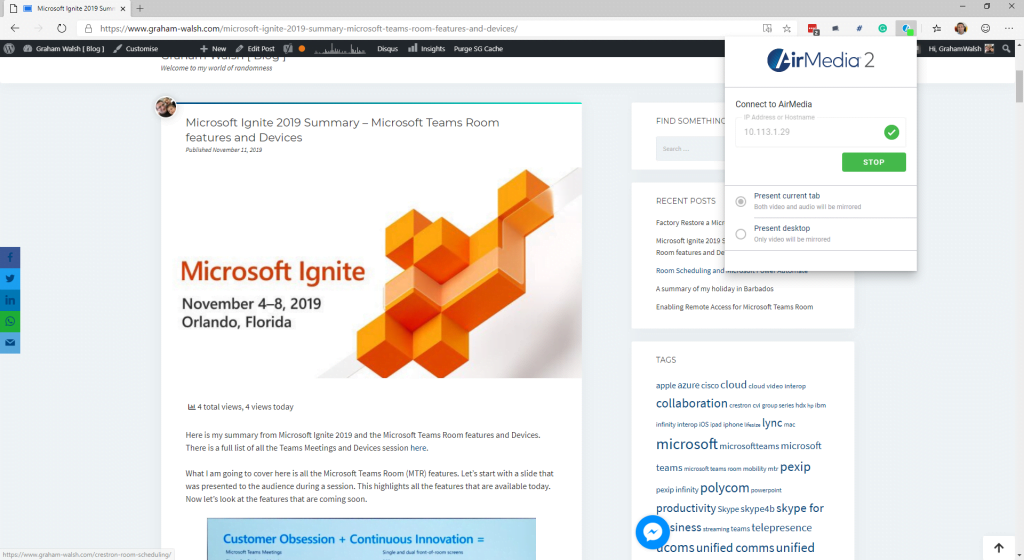
And this is what the MTR sees when it is being streamed.

And that is it. Super simple wireless sharing into a Crestron Flex Microsoft Teams Room system. Now you conference room can be cable and dongle free.
AirMedia Topologies
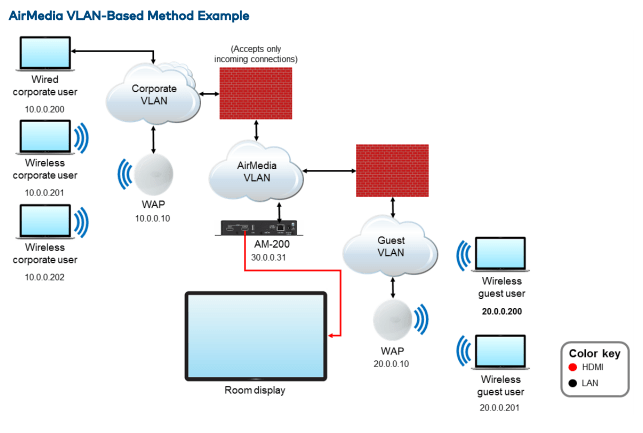
In meeting rooms, guests may want to present to corporate users. Keeping the guest networks and corporate networks separate while allowing the users to share a display need not be challenging. As a standard network device, AirMedia solves this problem by using standard networking practices. There are two recommended methods: the VLAN-based method, and the physical air gap method.
VLAN
In this scenario, AirMedia devices are placed in their own VLAN. This VLAN is configured to allow only incoming connections. Outbound traffic is not allowed. The guest and corporate networks exist in separate VLANs. Since outbound connections are not allowed, the guest VLAN cannot access the corporate VLAN through the AirMedia VLAN.
Physical Air Gap
If networks (for security reasons) require some type of physical separation, there are two approaches when using current AirMedia devices:
- With devices such as the AM-101 that have a single network interface, two AirMedia devices can be used, one for corporate users and one for guest users.
- To switch presentations in the HDMI interface domain, use an HDMI switch such as the DMPS3-4K-250-C or DMPS3-4K-350-C. While extremely secure, this approach requires more hardware.

So there we have it, options, choices, all from one vendor to expand your Microsoft Teams Room. Not a one size fits all approach. It also means a single vendor to go to for support and troubleshooting.
Any questions, pop them below or ask me on Twitter/LinkedIn.