
What's in this post...
![]()
Last Updated on December 12, 2018 by Graham Walsh
In the previous posts,we covered setting everything up, now this is about the penultimate step for deploying the Pexip in Azure conference node.
Configuring the Pexip Infinity Conference Node
Step Zero – Log into the Management Node
First log into the management node. To find the IP address of this, just look in the Azure Portal for the Public IP address of the management node, once you have opened a web page to it, log in with your credentials.
Step One – Configuring the Conference Node in Pexip Infinity Manager
To setup the conference node in Pexip you can follow the guide here. Just log back into the Pexip Infinity Manager and go to Platform Configuration > Conferencing Nodes > Add Conferencing Node
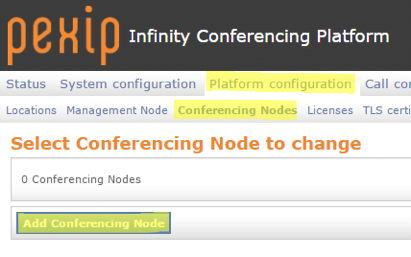
Select Generic (configuration only) from the drop down menu and click Next

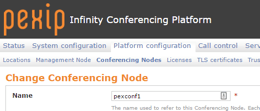
Enter the basic information like your Conference Name, IP address and subnet, default gateway and the DNS Host name and DNS Domain name.

Next click on the green plus icon to create a location. For now, we just need to provide a location name, DNS servers and the NTP servers. Scroll to the bottom and click Save.

Scroll to the bottom and enter a SSH password you would like to use for this conference node. Remember to keep the password safe in case you need SSH into the conference node. Then click Finish.

Next download the configuration file to your local machine. It will be a XML file.

Step Two – Applying the config file to the Conferencing Node in Pexip in Azure
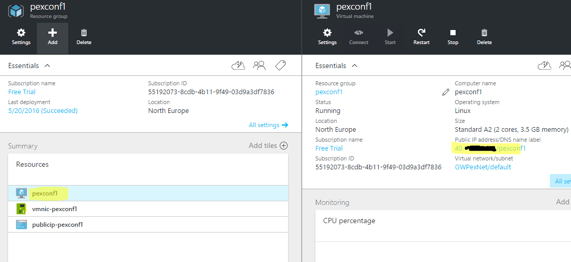
Jump into the Azure Dashboard and find the conference node (hopefully you pinned it) and browse to and then browse to the virtual machine.

Like before, you will be able to copy the public IP address.
Now navigate to the IP address and remember to include :8443 at the end e.g.: https://40.13.121.111:8443
You will be presented with a very simple page. Find the downloaded XML by clicking on Choose file and then click Upload.

The Conferencing Node will apply the configuration and then reboot. When it has rebooted, it will connect to the Management Node. You can close the browser window used to upload the file.
Step Three – Check the Conference Node can chat to the Management Node
Navigate back to the Pexip management node and go to Status > Conference Nodes. You should see the last contacted state as green which means it is online and talking to each other.

Step Four – Apply a static NAT config to the Conference Node
As our Azure deployment has a private addressing scheme, but we also have a public IP address assigned, we need to apply the Static NAT IP to the conference node as that is where all the media goes.
Navigate to Platform Configuration > Conferencing Nodes and select your conference node and click on it. Scroll down to the IPv4 static NAT address field and enter the public IP address from the Azure Dashboard. Then click on Save.
It will take one minute for the changes to replicate.
That is it, we know have a fully deployed Pexip Infinity platform in Azure. In the final part of the blog post series, we will create a test call to ensure everything is working. Part Six can be found here.
Blog Series Links
Part One | Part Two | Part Three | Part Four | Part Five | Part Six | Part Seven