
What's in this post...
![]()
Last Updated on December 12, 2018 by Graham Walsh
In this step we are now going to create the Pexip in Azure Conference node. This is the server that does all the transcoding of the various media such as H.323, SIP, MS-SIP, H.239 and BFCP for content sharing.
Preparing the Pexip Conference Node
Step One – Deploy the Conference Node Template in Azure
Similar to the previous step of deploying the management node, we need to run the template again. Choose the template from the Pexip site. I am going to use the same public IP template for my deployment.
I just need to get the URL of the conferencing node by going to Resource Groups > gwpex > gwpexstorage > Blob service > vm-images. Then click on the image and ensure it is the conference node image. Copy the URL to the clipboard.

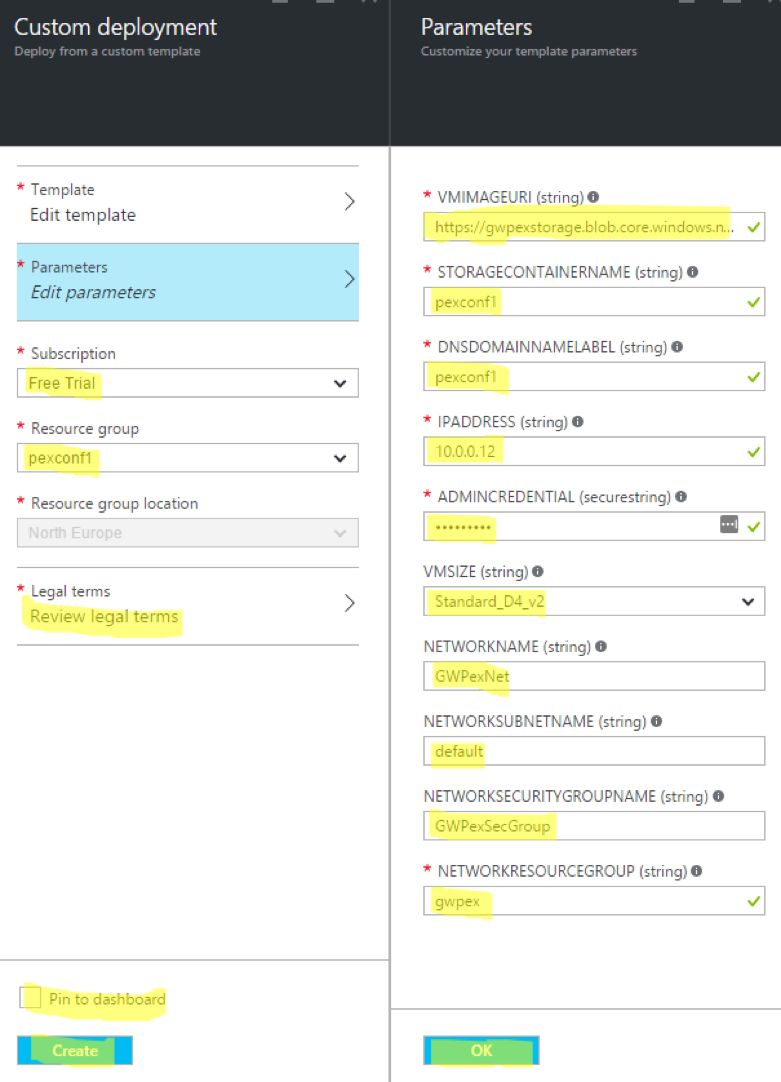
Enter all the details in the fields, remembering that Resource Group is unique to each server you run. Also you need to create a folder under the storage account for the conference node (via Blob service). However, network resource and security groups will be the same. Click OK, review the legal terms and click Create. One thing to note that because I am on a trial account, I can only select a Standard D2 VMSize as it is limited to the number of cores. This will give me 2 HD calls which is fine for experimenting/testing. You will need to have a full Azure account if you were to select the D4_V2 which will give you approximately 15HD calls.
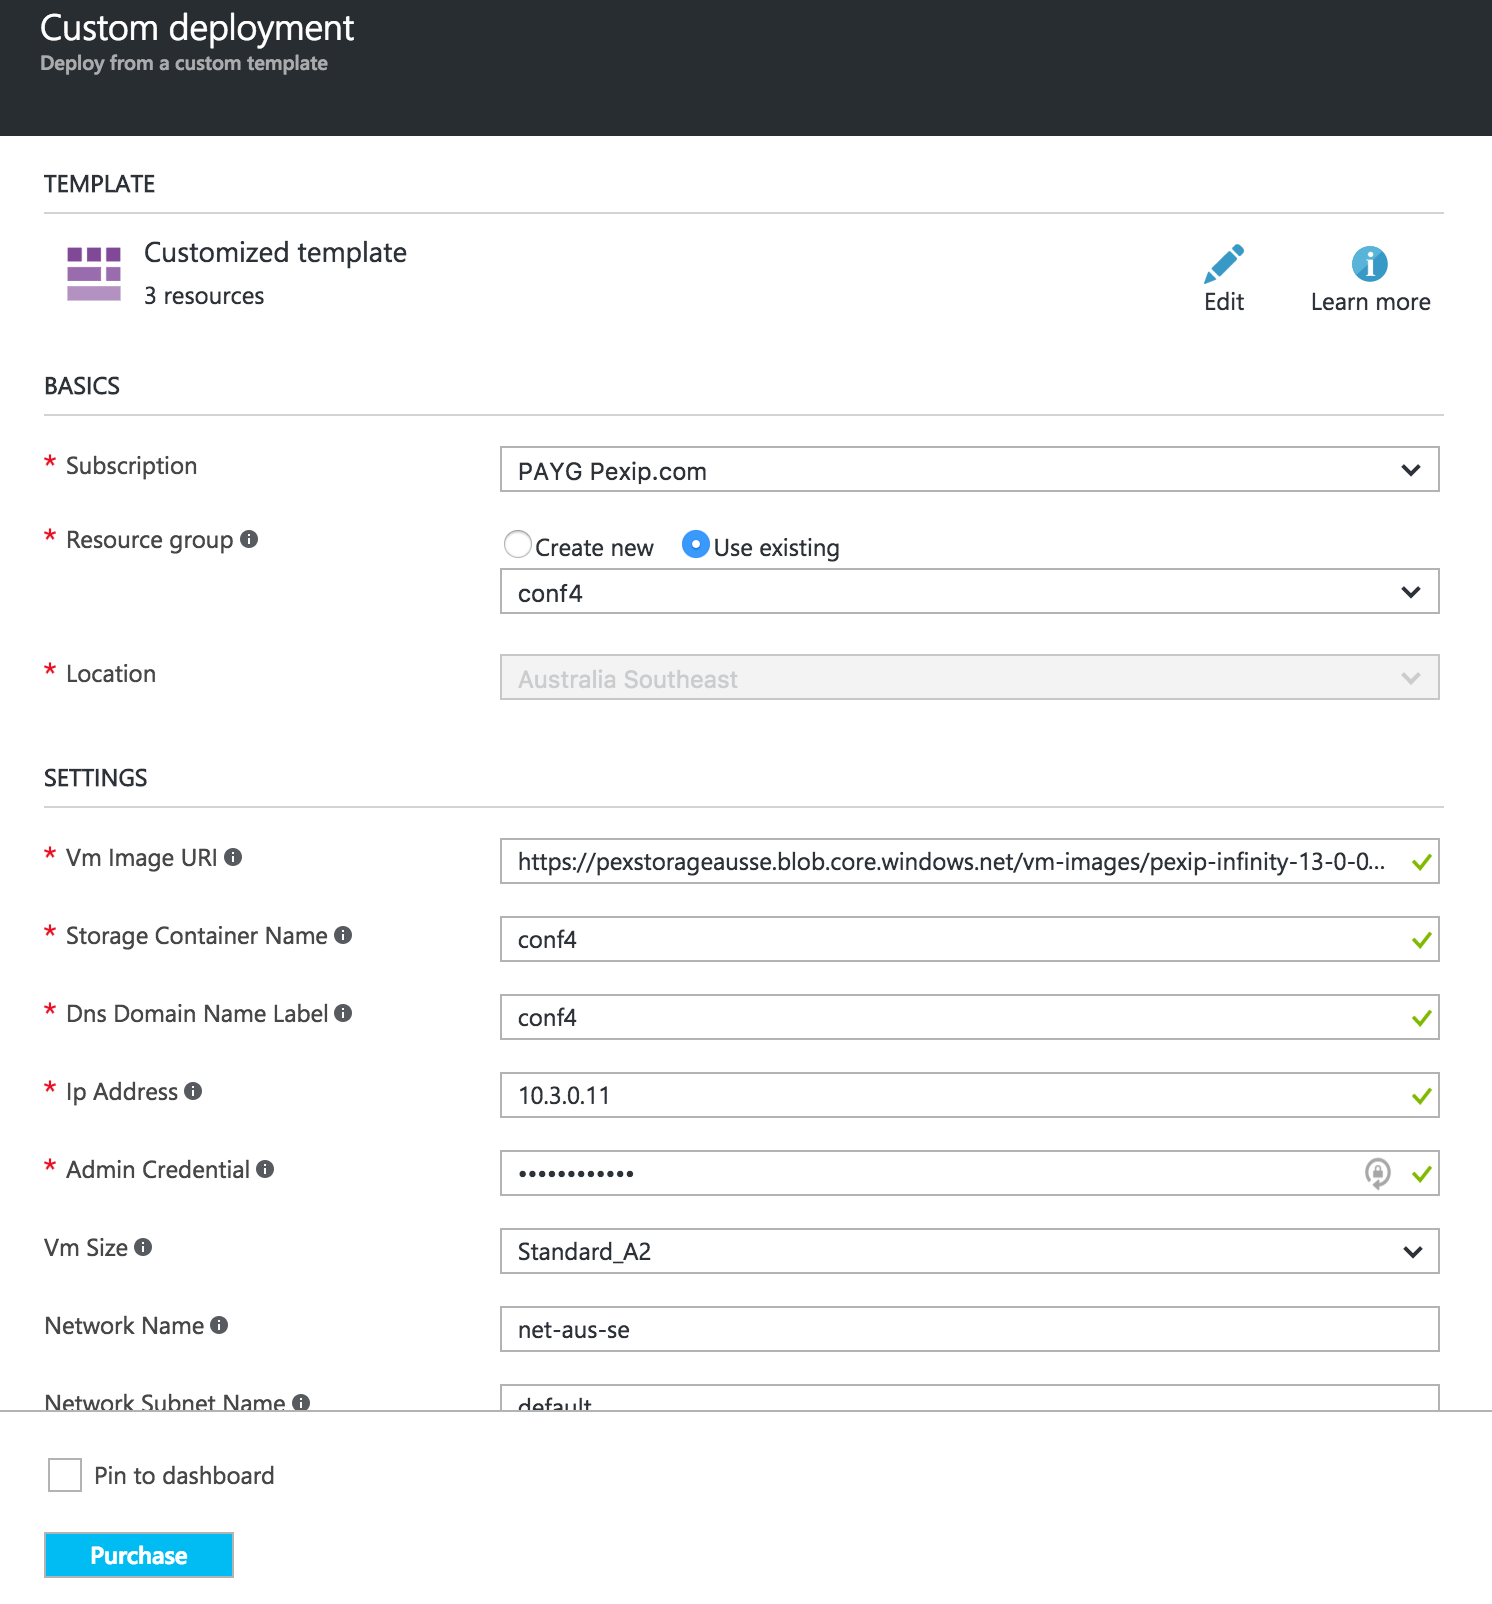
As of 22nd October, Azure has changed the Custom Deployment template a little, so the updated image is below.
In your Azure dashboard you will see it deploying the template.

In the next part of this guide, we will run through configuring the Pexip Conference Node from the Management Node. Part five is here.
Blog Series Links
Part One | Part Two | Part Three | Part Four | Part Five | Part Six | Part Seven