What's in this post...
![]()
Last Updated on November 30, 2021 by Graham Walsh
With Crestron XIO Cloud, you can use a Crestron.io Azure Identity, or you can use your own Okta sign in. However, you may want to use your own Azure AD sign-in credentials. Let me show you how this can be set up. It will need a ticket opened with the Crestron support team to enable your tenant and create a subdomain for you. Crestron has now got a simple form online where you can submit your request here.
Prior to setting this up, you need to have an operational crestron.io login and subscription to XIO cloud.
My Example of a custom Crestron XIO Cloud
- Default Crestron XIO URL: portal.crestron.io
- My Custom Domain Name: crestron.xyz
- My custom XIO domain: gwalsh-portal.crestron.io. (Most of the time you will use your domain/company name as the prefix such as contoso-portal.crestron.io)
Step One – Create an App Registration
We now need to create an app registration and provide those details to Crestron Support. In the Azure home page, you can search for it or click on it.

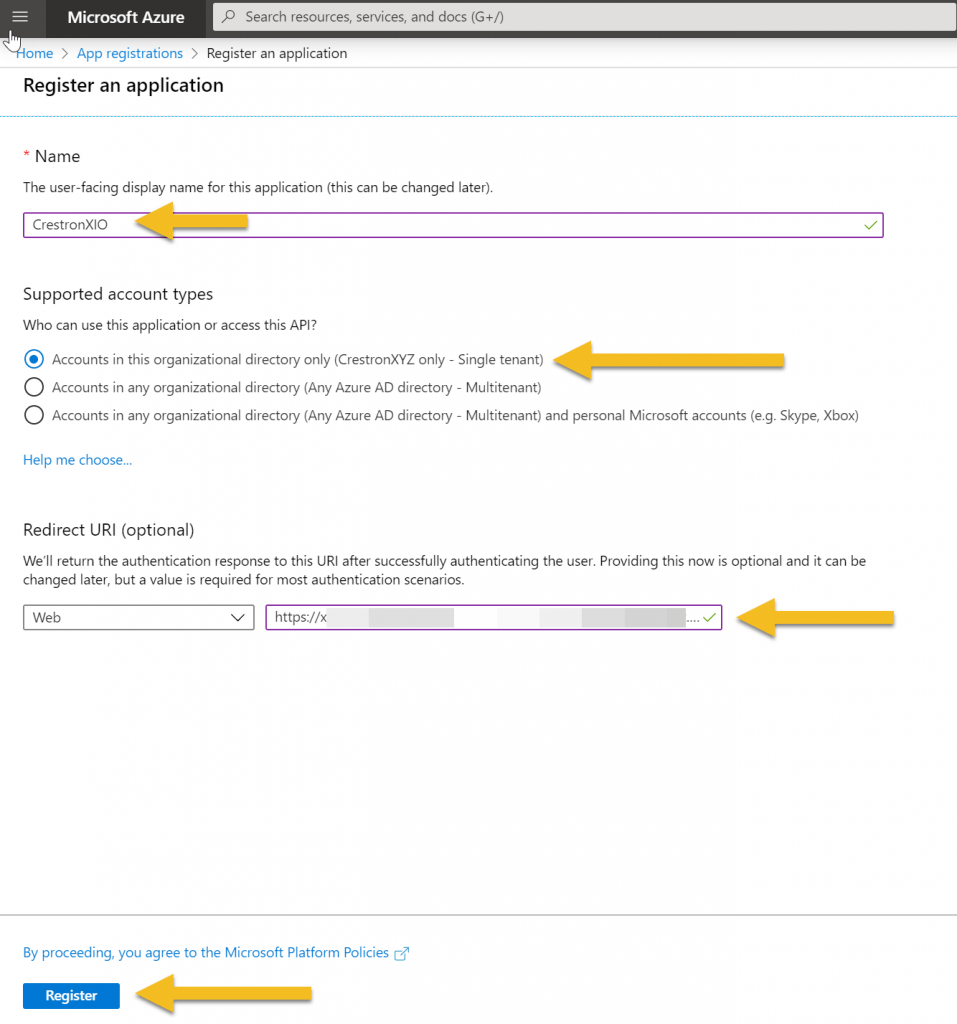
Now select New Registration and give it a name (it can be renamed later).

Once you have given it name, choose which support account types. The Redirect URI will be provided by Crestron support. Then click register. You will probably create App registration without the redirect URI as that may be supplied after you have setup the app registration. Then click on Register.
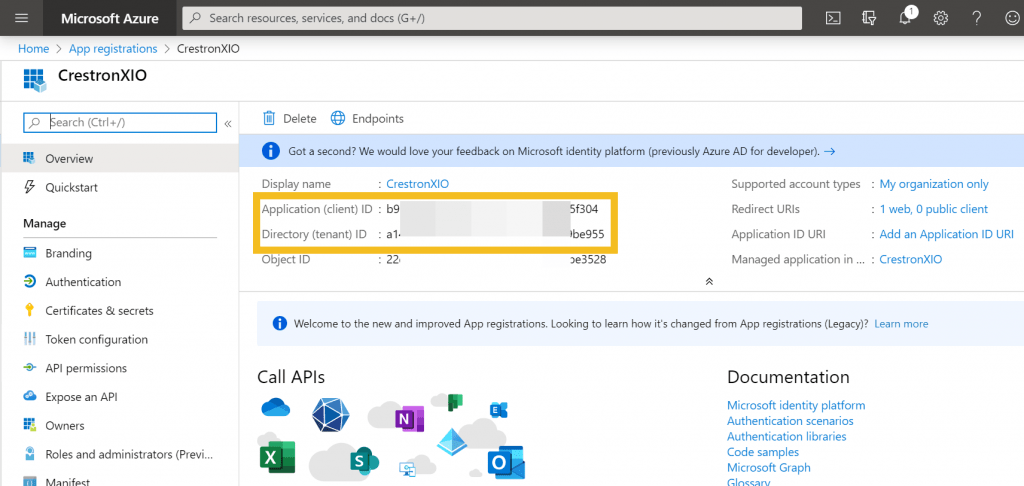
Once created, you will see the Application (client) ID along with your Directory (tenant) ID, which you will need to supply to Crestron support.
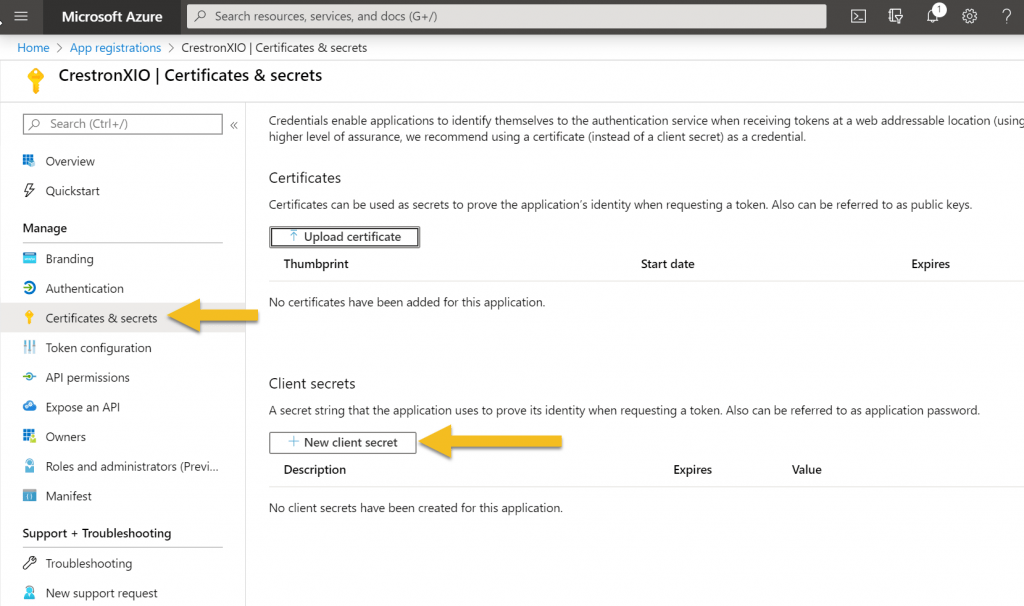
Step Two – Create a client secret
Now we need to navigate to the Certificates and secrets and select New client secret.
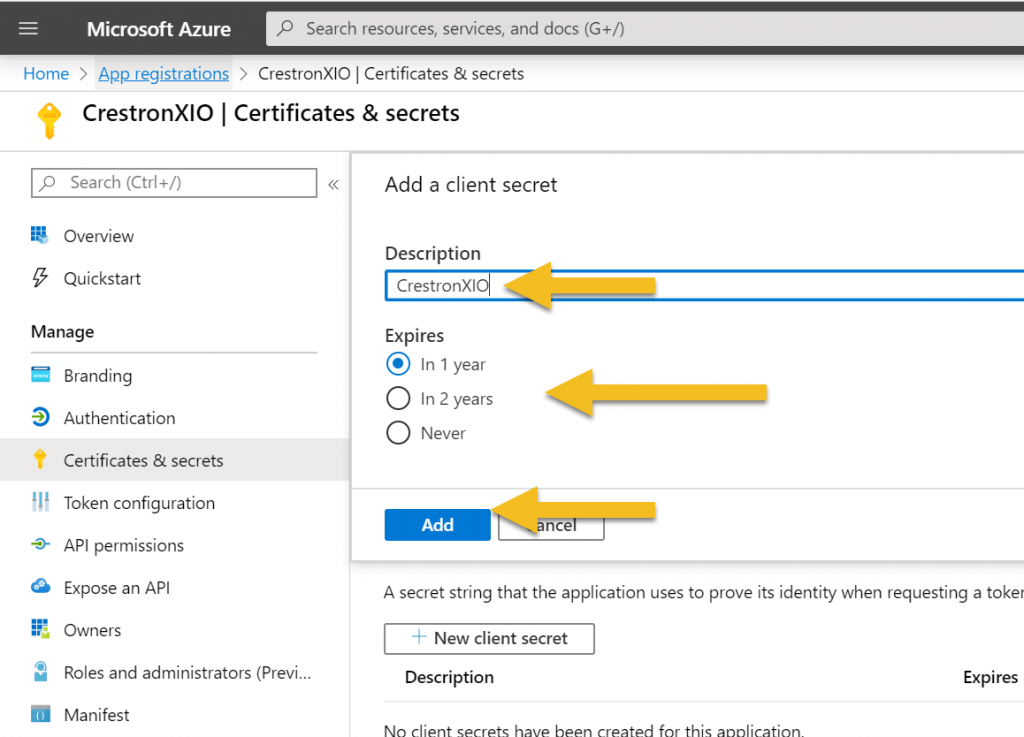
Now give the secret a name and select how long you want it valid for and click Add.
Now you need to copy this and again this will be supplied to Crestron Support. If you want, you may want to do this over the phone or encrypt this info when submitting this info.

In summary, we should have three items to provide Crestron with:
- Desired name
- Application Client ID
- Client Secret
Step Three – Create an XIO User
Once it has all been setup, you will now need to head into your XIO account and sign in with your default, so it could be john.doe@crestron.io and go to your Users tab. Now we need to create a new user using the External Domain option.

Step Four – Test it out
Once all that is done, we can now test out our new domain and authentication. Navigate to your custom domain and you’ll be presented with the default screen. Once you click on Sign In, you will then be redirected to your Azure AD and will then be signed in based upon the permissions set above.

That’s all for now, any questions let me know.