
What's in this post...
![]()
Last Updated on April 12, 2016 by Graham Walsh
So I first covered off the Management Node in this post and now we are going to cover off setting up a Conference Node for lab purposes only.
Step One – Select Location & Launch
Make sure you select the same region as where the management node is located as the AWS datacentres are not physically connected.

Step Two – Select AMI
As before, select the Community AMIs and search for Pexip, this time selecting Conferencing Node.

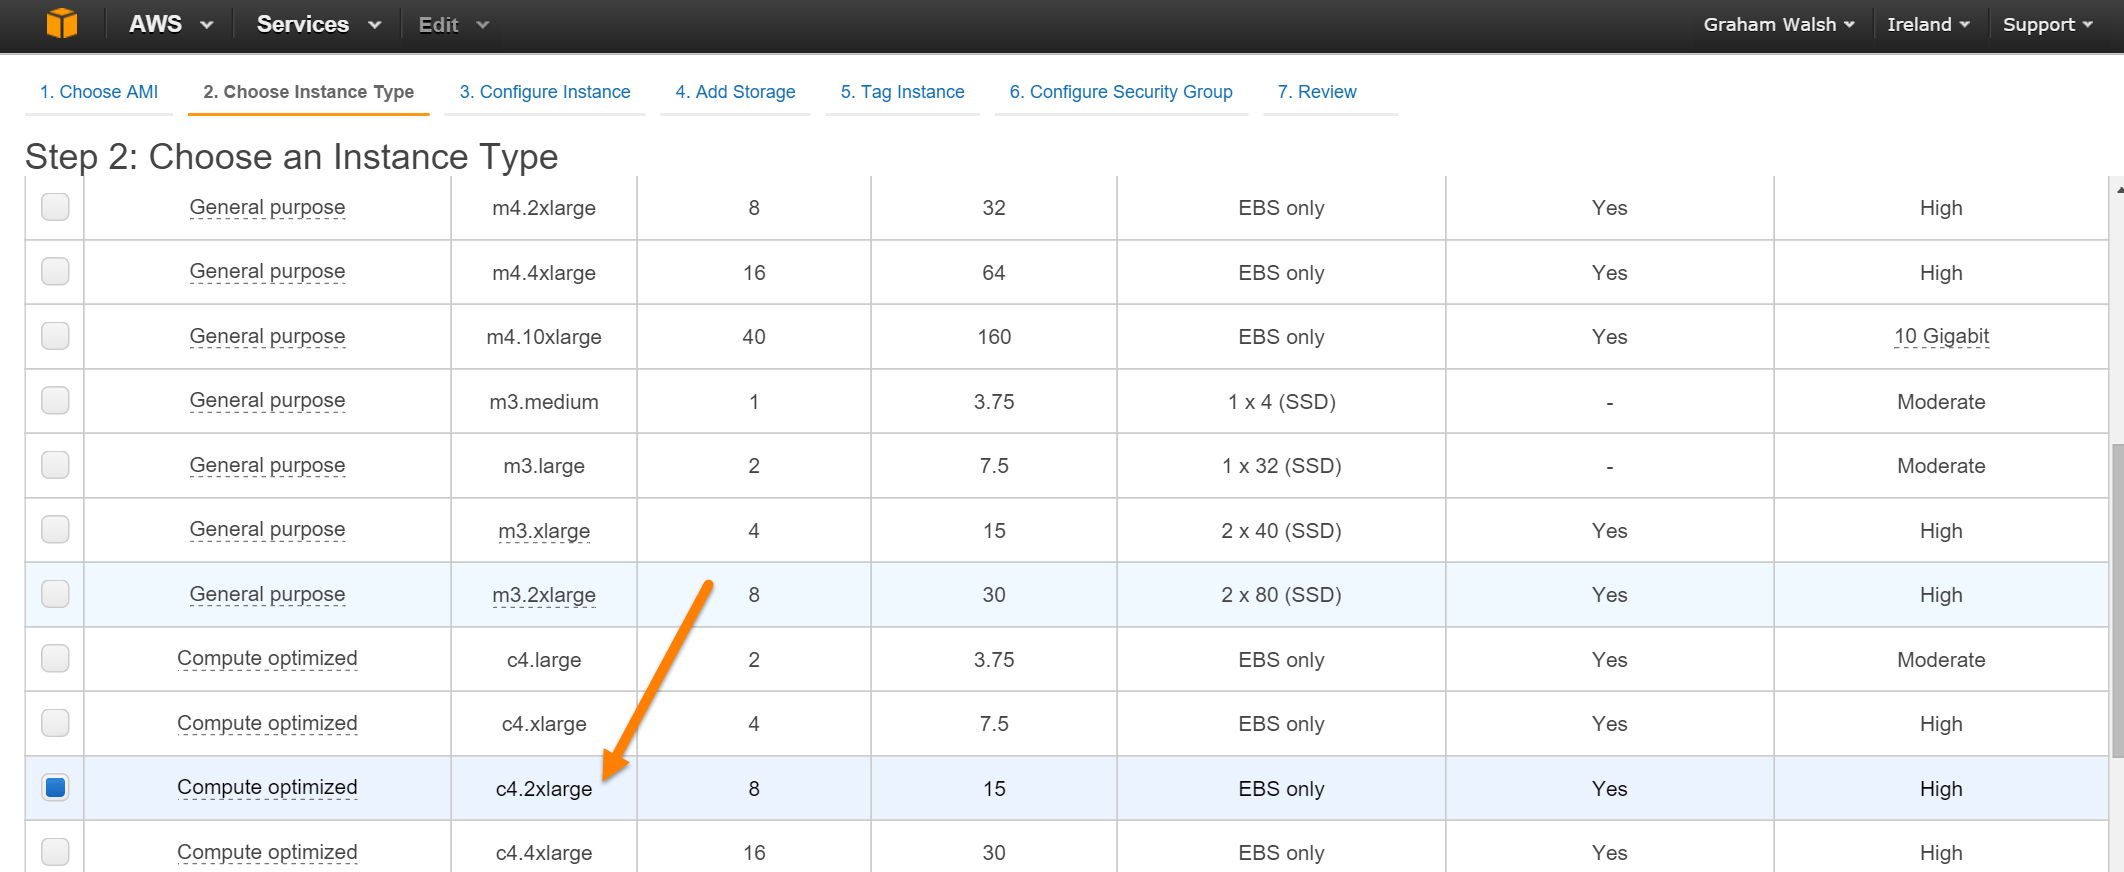
Step Three – Select Server Size
For the conferencing node server, as this will be doing the processing of the work, we need to select a more powerful machine, so the Pexip recommendation is a c4.2xlarge. This is good for approximately 15 HD calls.
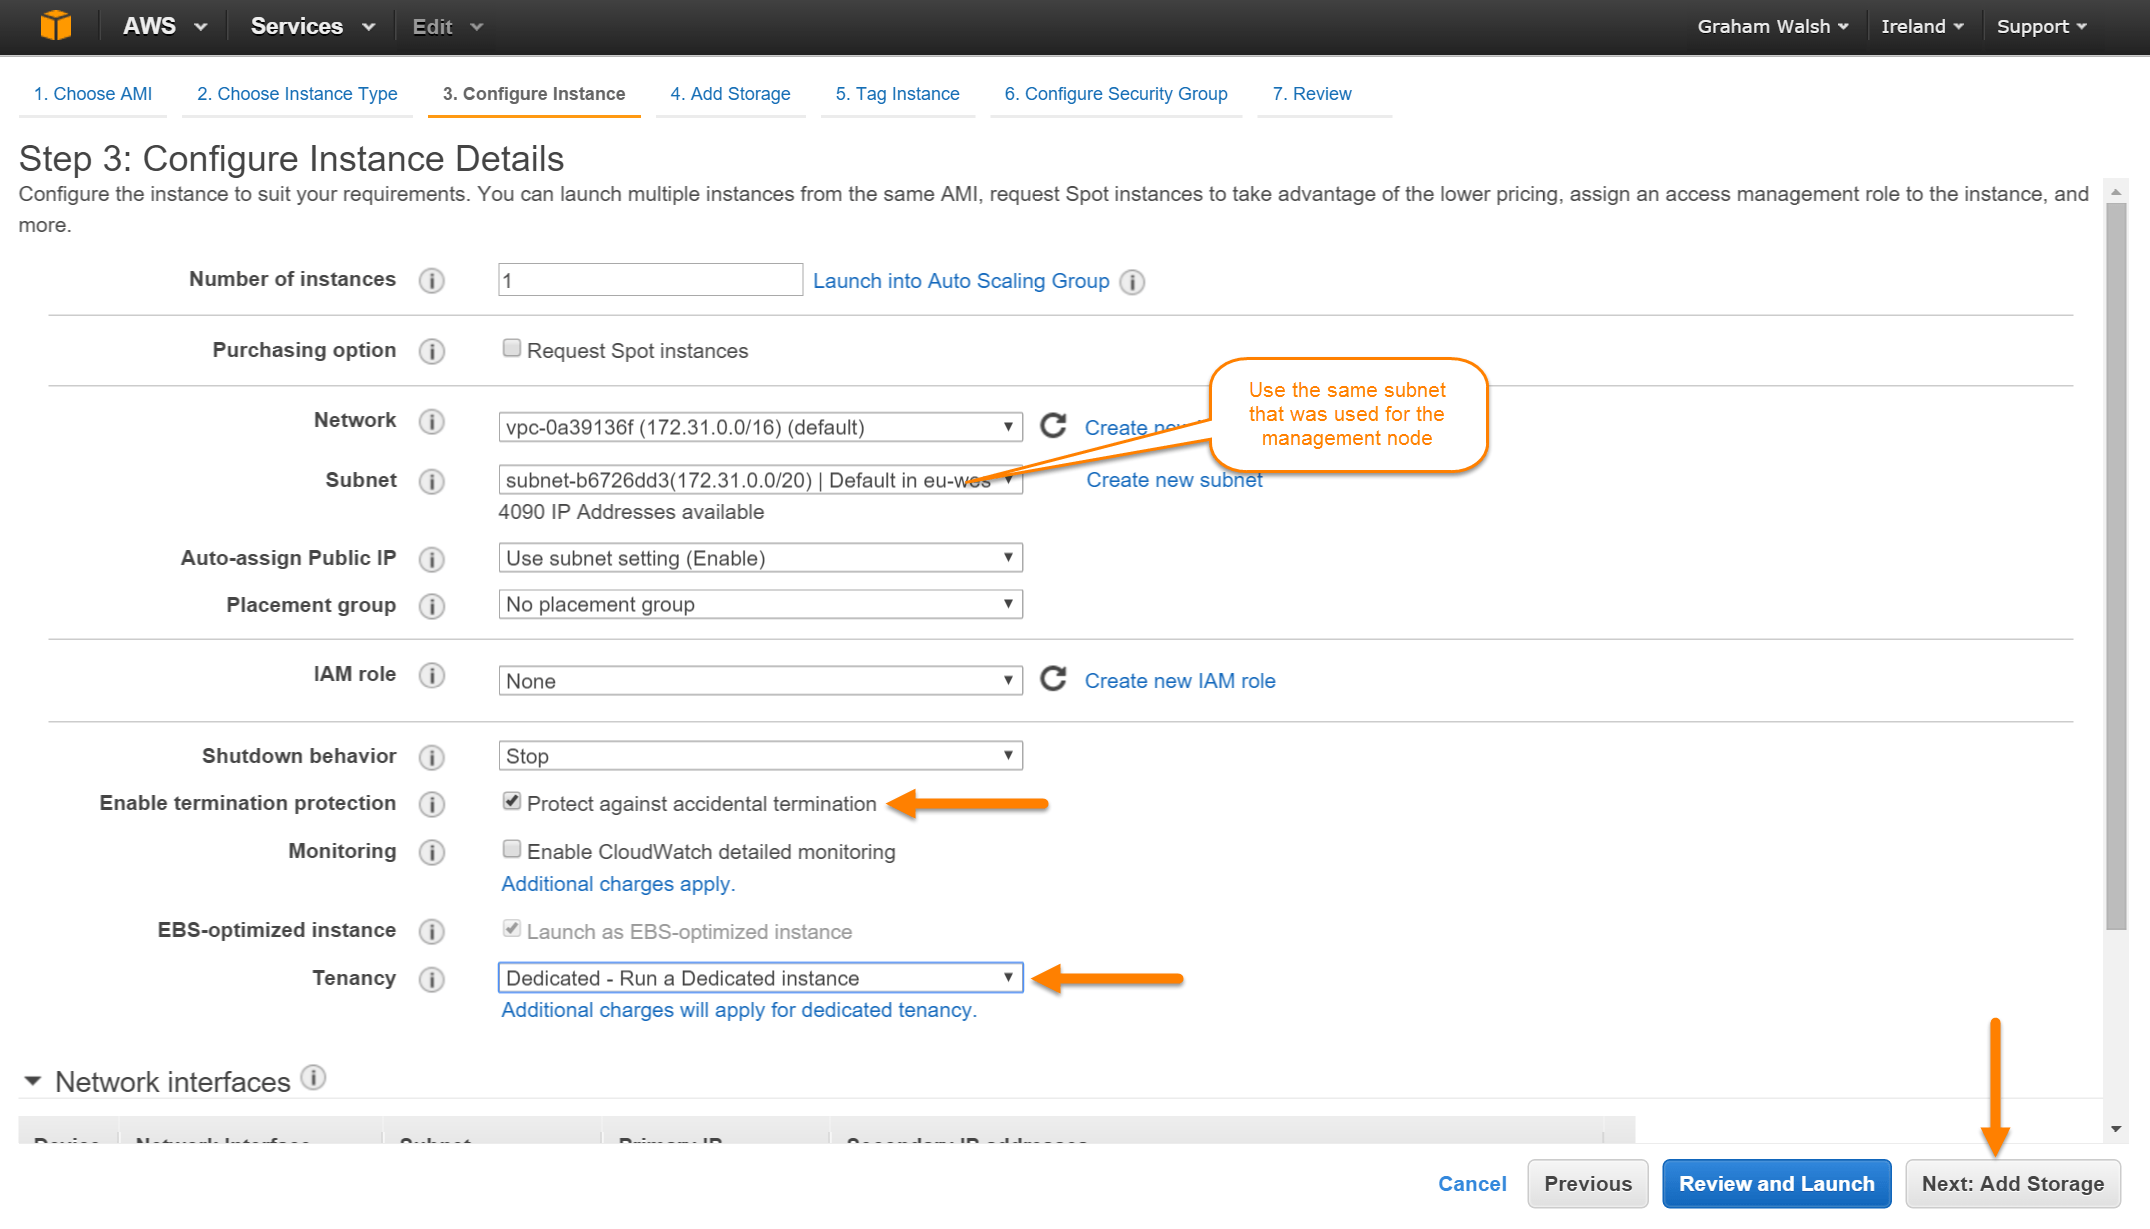
Step Four – Configure Instance Details
Like before, select the same subnet and also this time we need to run this as a dedicated instance. Then select Next: Add Storage
Step Five – Select Storage Type
Again like the management node, there is no need for SSD drives here, so select Magnetic.

Step Six – Tag Instance
Here you input the display name of the server and any required tags.

Step Seven – Configure Security Group
Here you can select the security group we created for the management node and select Review and Launch.

Step Eight – Launch Instance
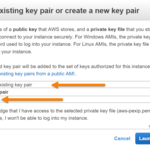
You now just need to launch the instance and also select the key pair, again using the same one that was used in the management node.
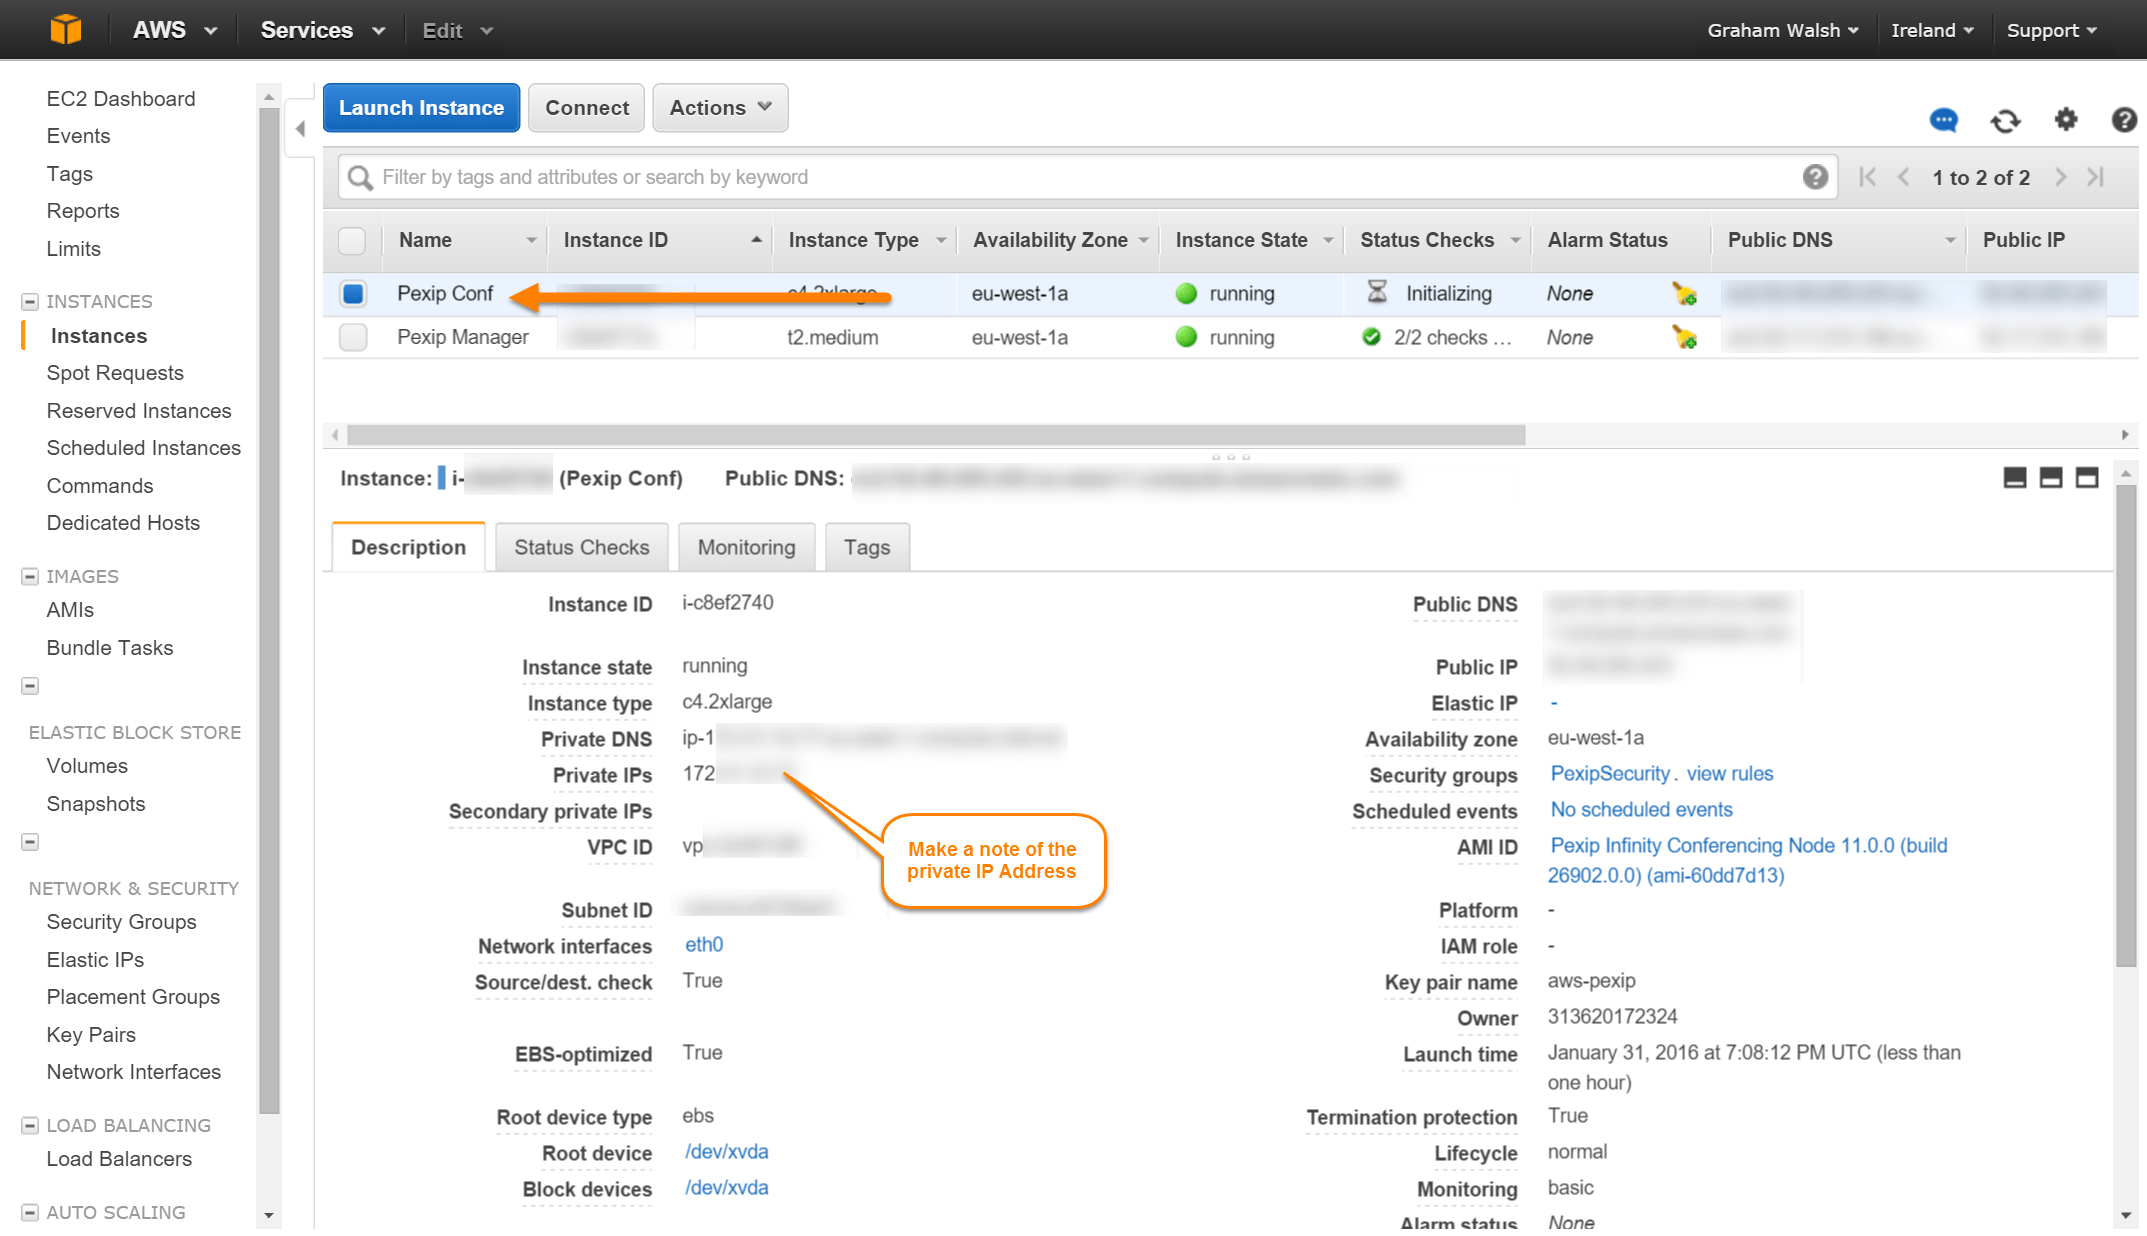
Step Nine – Obtain LAN IP Address
Once the machine is starting, make a note of the LAN IP Address as we will need this for configuring the Conference Node inside the Management Node.
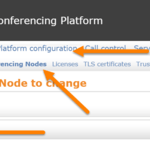
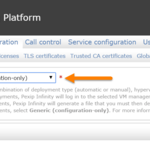
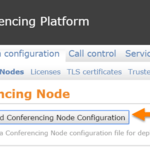
Step Ten – Adding a Conference Node
Now navigate to the Management node on AWS and select Platform Configuration > Conferencing Nodes > Add Conferencing Node. Then on the next screen select Generic (configuration only)
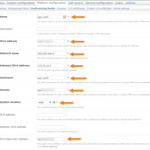
Now input all the required details and you will also need to create a location site as part of the initial setup. Make sure you also select the STUN server from the dropdown. Once finished, download the configuration file.
Step Eleven – Uploading Conference Node File
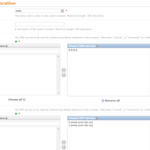
Now that we have created a conference node config, we now need to upload it to the virtual server. Navigate to the conference node via a browser and add in port 8443 e.g. http://10.20.30.40:8443 and you will be presented with a simple page. Pick the file and select Upload. You can now close the browser window.
Step Twelve – Checking for Connectivity
The virtual server will now reboot and it will take 15-20 minutes for the management node and conference node to sync up. Once it has, you will see it in the status window.

There is also another step required if you are using this in a lab environment and keep shutting the VM down. I have covered the requirements in part 3 on what needs to be changed to ensure it is working again when booted up. http://www.graham-walsh.com/2016/02/deploying-pexip-in-amazon-web-services-part-3/