
What's in this post...
![]()
Last Updated on December 12, 2018 by Graham Walsh
So in part one, we setup Azure with Networking, Security and a Resource Group. In this part of setting up Pexip in Azure, we will prepare the servers so that we have in them in our own subscription.
Preparing Virtual Servers
Step One – Prepare your Windows client
So we need to connect our local machine to Azure so we can run a PowerShell script. There is a guide here from Microsoft. Essentially, run PowerShell ISE as Administrator by right clicking on it and select Run as Administrator.

Once in PowerShell run the following two commands
# Install the Azure Resource Manager modules from the PowerShell Gallery
Install-Module AzureRM
# Install the Azure Service Management module from the PowerShell Gallery
Install-Module Azure
If you get any prompts, just select Y for Yes
Step Two – Preparing Disk Images for Pexip in Azure
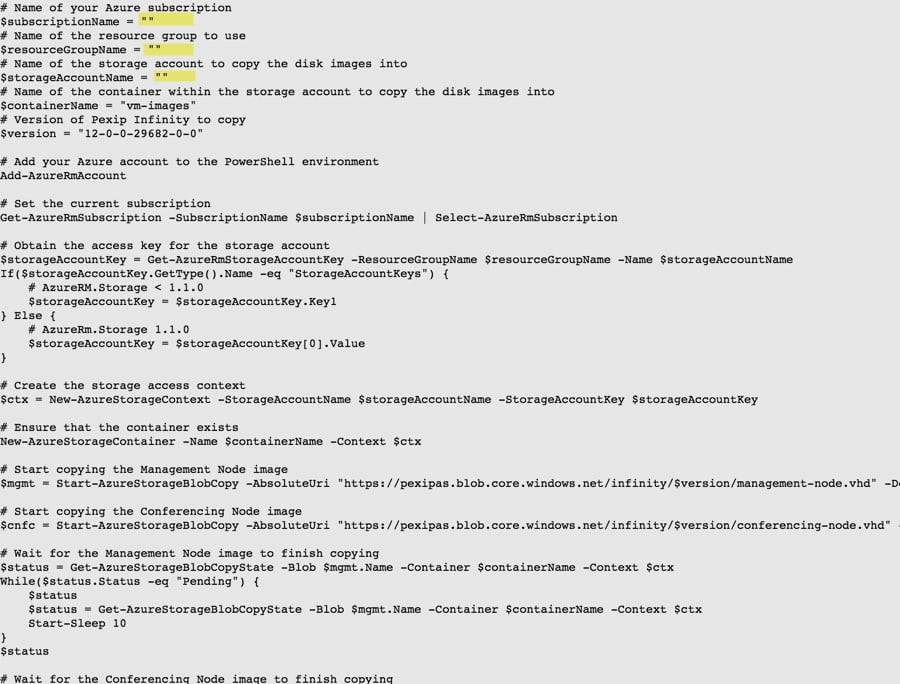
Now we need to edit the PowerShell script from the Pexip Docs site that Prepares the disk images for use. You need to add in your Subscription Name (mine is Free Trial), Resource Group Name (mine is gwpex) and your Storage Account name (mine is gwpexstorage). Simply cut and paste the text from the docs site into text editor. You can see below where I have typed in my parameters and save the file as a .ps1 file.
Close the file and right click on it and select Run with PowerShell. You will be prompted to login, so just enter your Azure login credentials. The script will now run and copy the images over to your storage account. This will take approximately five minutes to copy across.
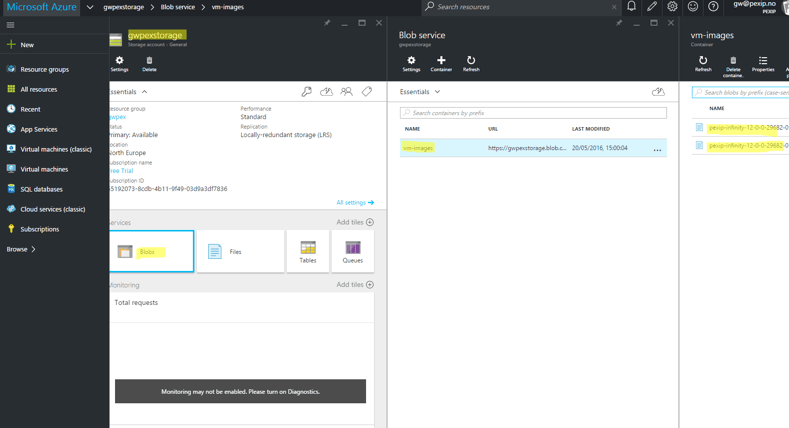
To visually see that the images have copied across, just go to your Azure dashboard and click on your Storage Account, then on Blobs > vm-images. You will then see the Pexip Management Node and Conference Node within your Azure subscription.
Step Three – Preparing the VM instance for the Pexip Nodes
Now we need to create a new container for the Pexip Management Node and Conference Node(s). To do this, it must be in the same storage account (gwpexstorage in my case). Just click on Blobs > + Container. Give it a unique name (such as pexmgr) and Access Type as Container (could also be a Blob) and click create.

Do the same for a conference node too now so that it’s all prepared for later. I’ve called mine pexconf1. If you need a 2nd conference node, call that say pexconf2.

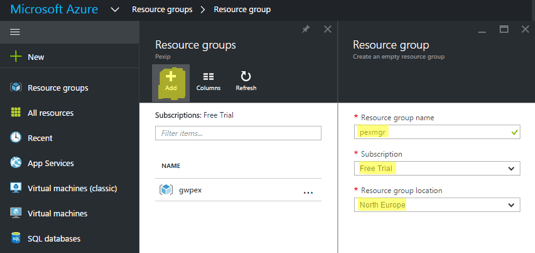
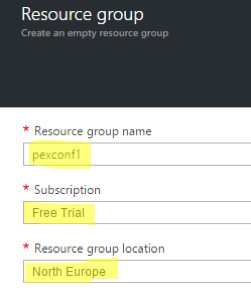
Next we need to create a new Resource Group that is unique to the Pexip Management Node and each Conference Node.
Step Four – Gathering information for the deployment template
Over on the Pexip docs site, there is a table that explains all information required and what each piece is for.
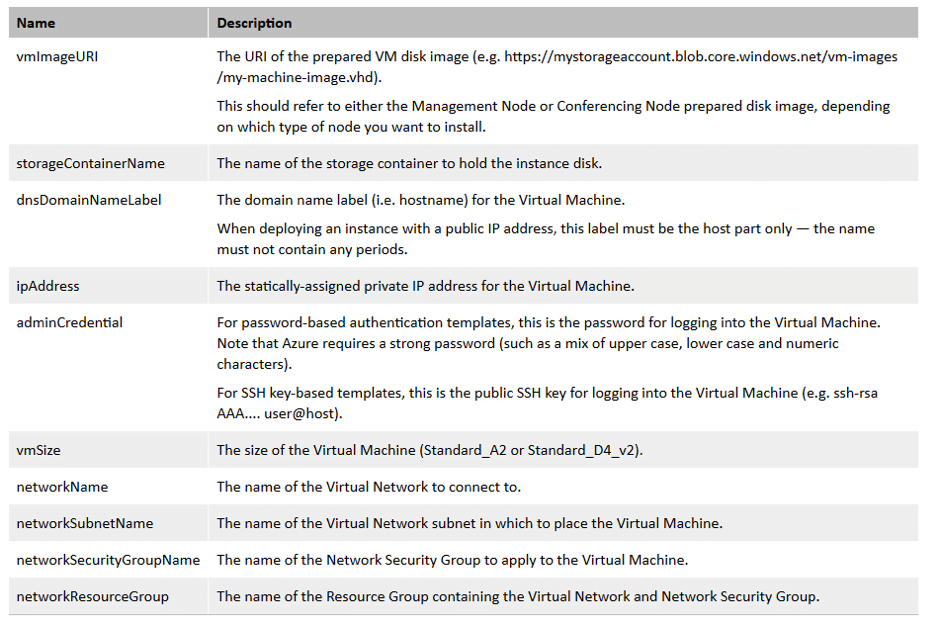
There is a template available on the Pexip site where you can choose what sort of deployment you want in Azure. As I shall be connecting mine to Office 365, I will need a public IP. I will also use password based authentication.
Firstly, you will need to capture some information before clicking on the template. We need to know the URL of where you copied the management node. To find this, just navigate to your Storage Account > Blob server > vm-images. The click on the Management node. You can check this as it will be in the title under Blob properties as shown below. Next click on copy to clipboard icon.

To find your Storage Container Name, just navigate to your Storage > Blobs and then you will see the name you created in the previous step for Management Node container.

The other credentials require are straight forward, just need to remember you IP range and provide it an address (don’t use 10.0.0.1 as it is reserved and will fail), a DNS Host name, a password.
You then just need to find local your Network Name (which we created above), the Network Subnet Name, Network Security Group and the Network Resource Group, this is listed under Resource Groups, so as in the image below you can see mine is gwpex as that is the Resource Group where my network sits. All of these variables were created above.

Step Five – Run the template
Now you can run the template URL since you have all the requirements and then enter them all. You will also need to review the legal terms and “purchase”. Then click on Create.

This concludes part two of preparing the servers and in the next part we will begin the Pexip installation of the management node. Part three is here.
Blog Series Links
Part One | Part Two | Part Three | Part Four | Part Five | Part Six | Part Seven